In this tutorial we’re going to learn how to perfectly align objects and distribute them using Sketch 3. I’m going to use some basic examples to fully explain the options–you’ll be surprised at some of them!
1. Aligning a Single Layer to the Artboard
This is perhaps the easiest technique here.
Look at the top of the inspector: you’ll see a few alignment-related buttons. The six buttons located on the right (align left, horizontally, right, top, vertically and down) are for aligning layers among themselves, but if you only have a single object selected, it will be aligned to the parent artboard. Here’s how it works:

As mentioned, you can use the same buttons when you have multiple objects selected to align them among themselves. But what about if we want to align multiple objects to the artboard?
2. Aligning Multiple Layers to the Artboard
To align multiple objects to the artboard group them into one single Layer group. The group will act as a single object when you use the align buttons.
However, grouping in this way might not always suit your situation. Let me show you another approach.
Select the layers you want to align, hold down the alt key to make the align icons in the Inspector change their appearance. Now you’re aligning the layers to the artboard! Keep in mind that you need to have the selected layers within the artboard, otherwise this option won’t be available.
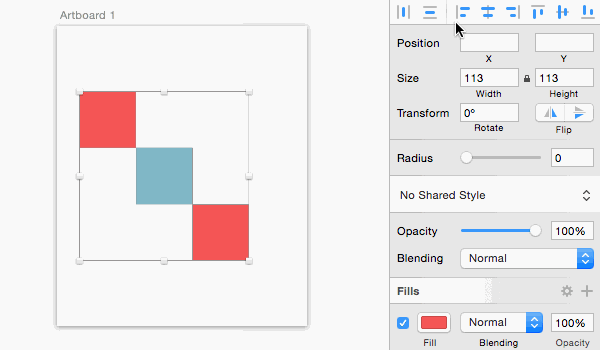
In the following example I have three different layers selected:
This works with Layer groups too; meaning you can select multiple Layer groups, hold down the alt key and align them to the artboard.
3. Aligning to Specific Layers
Another situation: I want to make everything align to a single object. First you have to understand that, by default, Sketch always aligns to the outermost layer of all those selected. That layer is referred to as the “key object”.
Consequently, to align all the selected objects to the top, the object found in the farthest top position will be the key object. Here’s an example where I align three objects to the top right position (the red square is our “key object”):

It would be nice if we could change the key object to match the one we want, right? Here’s the trick: lock the layer you want to act as key object, then select all the layers again. (You can only select locked layers through the Layers list).
In the following example the blue square is already locked, so it will act as our new key object. Now let’s align the objects to the top right again:

I discovered this handy trick thanks to SketchTips. And you can use the Align To plugin made by Lucien Lee to achieve the same results.
4. Aligning Vector Points
Tip: you can also use the align buttons to align multiple vector points when you’re in Edit Mode. Select the vector object, double-click to change to Edit mode (you can also use the Edit icon on the main toolbar) and select all the vector points you want to align.

5. Distributing Layers
If we look at the top of the inspector panel you’ll notice I haven’t yet mentioned the two alignment icons on the left. These buttons are for distributing objects horizontally and vertically. We can also distribute them evenly, which is very handy! Let’s say we have a few shapes selected and we would like to distribute them horizontally. Use the Distribute Horizontally button or go to Arrange > Distribute > Horizontally.

The leftmost and righmost layers will stay where they are, whereas the layers in the middle will be spaced out evenly between them. You can do the same along the vertical axis with the Distribute Vertically option.
6. Distributing Layers With a Fixed Spacing
Okay, but what if I want these layers 20px apart from each other? Distribute Horizontally/Vertically won’t help here.
In this case we can use the Make Grid tool (Arrange > Make Grid) to define horizontal and vertical spacings between the objects. It might be a little difficult to understand at first, so let me show you another animated example:

Here I wanted to distribute four different layers with a 20px spacing between them. I made a grid of one single row (to align all the layers horizontally) and four columns (one column per layer). Then I set the columns’ margin to 20px to get the desired spacing. If I want to distribute the layers vertically I have to make a grid of four rows (with 20px margin) and one column.
If you don’t feel comfortable using this method, you can try the SketchDistributor plugin. It lets you distribute selected objects with a specified spacing.
That’s All for Now
I hope you enjoyed this tutorial. Mastering the alignment and distribution tools in Sketch will save you a lot of time!
