In part one of this series (A Web Designer's Introduction to Shopify) I introduced you to the Shopify commerce platform, explained a number of its key concepts and illustrated how a Shopify theme is structured.
Moving forward, this tutorial will focus on Liquid, the Shopify template language. We'll look at the benefits of Liquid, discuss how it enables us to pull in and manipulate data from our stores and finally showcase a number of its key features that you will find yourself using daily in your Shopify theme development.
What Does Liquid Do?
If you aren't familiar with the concept of a template language, I often describe it as a bridge between the data in your store and the HTML templates sent to the browser.
By using some simple to read (and easy to remember) constructs we are able to access data from our store (e.g. a product title, a collection description, a set of product images or a blog post) and output that data directly into our templates. One of the main benefits is that we don't need to have any knowledge of what that data is - rather we just need to know which variables we have access to in each template.

How Does Liquid Work?
As discussed in part one of this series, Shopify decides which template to send to the browser based on the currently requested URL. For example if the URL is http://shopify-for-designers.myshopify.com/collections/cups Shopify will render the collections.liquid template.
Once Shopify has worked out the relevant template to render, it parses the template (and its outer layout file) looking for Liquid placeholders. When these are encountered Shopify replaces the Liquid code with the relevant data from your store.
Another way of thinking about template languages is like "find and replace" in a text editor. The platform, in this case Shopify, searches for all the Liquid placeholders and then replaces them with data from your store. The final constructed document is then sent to the browser as HTML.
It might feel a little alien at first if this is your first foray into templating, but you'll soon get the hang of it.
Placeholders
A placeholder is a piece of code that will ultimately be replaced when the template is sent to the browser.
There are two types of placeholders in Liquid. The first is the double parentheses {{ }} to denote output and the second is parentheses percentage {% %} to denote logic.
Here's a quick example of an output placeholder that you will typically find in the product.liquid micro template:
<h2>{{ product.title }}</h2>When rendered this would output the name of the currently viewed product in place of the {{ }}, for example:
<h2>Keir's Coffee Cup</h2>
Output, unless manipulated with a filter (which we will look at later) is simply a case of replacing the placeholder with text from your store.
Logic and Loops
As well as allowing us to get data from our store and displaying it in our templates, as demonstrated above, Liquid is also able to control exactly what is displayed in our templates using logic constructs and loops.
For example, we can choose to show a different snippet of HTML depending on whether or not the currently viewed product is in stock.
We are also able to use Liquid to output the same piece of code numerous times - for example a series of product images. Using loops allows us to output all the products associated with a product in a few lines of Liquid code.
Liquid is really powerful and whilst you might think we are getting into programming territory, I am confident you'll pick it up pretty quickly.
Liquid Basics
Now that you have a basic understanding of how Liquid works let's have a look at four key features and how they work in relation to theme development.
Output
As mentioned earlier the double parentheses {{ }} in a .liquid file denote an output placeholder. Here are two examples that you'll frequently come across:
{{ shop.name }}
{{ product.description }}
Output allows us to pull a specific piece of data from our store into our template and, as the name suggests, output it in place of the Liquid placeholder.
Let's say my store was called "Keir's Coffee Emporium". If I were to use the {{ shop.name }} liquid tag Shopify would grab the name of my store and replace the liquid placeholder with my stores's name directly into my template as HTML.
Equally, if we were using {{ product.description }} in our product.liquid template any text entered into the WYSIWYG editor for that particular product would be output in the place of the {{ product.description }} placeholder.
Note: The WYSIWYG editor will output formatted HTML so you don't need to wrap your {{ product.description }} with any HTML elements, e.g. a <p>.
Any variable, whether it be a global variable (available in every single template in your theme) or a template level variable (available only to a specific template) can be output in this way. Other examples include:
{{ shop.description }}
{{ product.title }}
{{ collection.title }}
{{ collection.description }}
For a full list of variables that you can output in your themes I highly recommend bookmarking Mark Dunkley's cheat sheet. I find myself using this daily.
To summarise, Liquid output is very much like "find and replace". When rendering the template Shopify will go and find all instances of Liquid output tags and replace them with the relevant data from your store.
You'll also notice from these examples that Liquid uses the dot syntax for accessing data. The item preceding the dot is the variable, whereas the item after it is an attribute of that variable. For example our shop variable above has both a name and description attribute.
Logic
Let's move onto Liquid logic. Whilst mildly more complicated for first time users logic tags aren't that difficult to understand once you have tried them out for yourself.
Whereas Liquid output placeholders allow us to grab data and display it in our templates Liquid logic tags allow us to control the flow of a template. Unlike output tags the inclusion of logic tags in your templates does not result in anything being directly rendered, rather they allow us to control what is rendered.
A typical example I use to to illustrate how Liquid logic is used is to highlight when a product is sold out. The following example would typically be found in the product.liquid micro template:
{% if product.available %}
This product is available
{% else %}
Sorry, this product is sold out
{% endif %}
As you will see the syntax for Liquid logic is slightly different to output. Instead of the {{ }} delimiters we use {% %}.
In the above example we are controlling what is output to our template using a simple if, else, endif statement. In many ways if statements are like questions.
In the above example if the answer to our if statement question is true we render the words "This product is available", if it's false our template carries on and outputs the text following our {% else %} clause - in this case "Sorry, this product it sold out".
You will find yourself using if statements a lot in Shopify theme development. Here's another example to help your understanding:
{% if cart.item_count > 0 %}<p>You have {{ cart.item_count }} item(s) in your cart</p>
{% else %}<p>There's nothing in your cart :( Why not have a <a href="/products">look at our product range</a></p>
{% endif %}
This example demonstrates one way you can either display the number of items in a visitors cart or output a link to your products.
A Quick Word on Operators
You'll notice in this example we are using the greater than > operator. As the cart.item_count variable returns the number of items in the current users cart we can check to see if it is greater than zero, i.e. it has items in it.
If this returns true we can output the message with the current item count, if not we can output <p>There's nothing in your cart :( Why not have a <a href="/products">look at our product range</a></p> instead.
You have access to a wide range of operators in Liquid, many of which you will find yourself using regularly:
==equal!=not equal>greater than<less than>=bigger or equal<=less or equalorthis or thatandmust be this and thatcontainsincludes the substring if used on a string, or element if used on an array
Loops
Next let's turn our attention to the concept of Liquid loops.
If you have done any form of basic programming the concept of looping over data will be very familiar to you. Using a loop, often known as a for loop, allows us to output the same piece of code a known number of times in our template.
Let's have a look at an example from a Shopify theme to help solidify the concept:
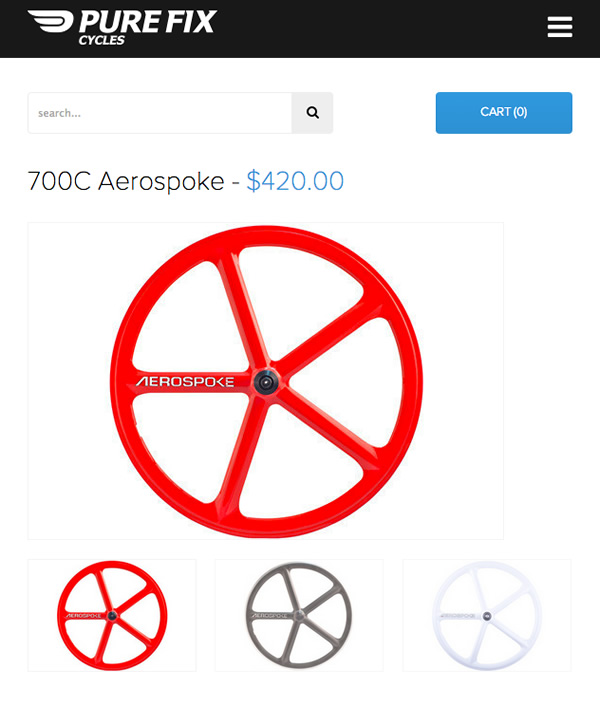
{% for image in product.images %} <img src="{{ image | product_img_url: 'small' }}">
{% endfor %}
In this example, typically found in the product.liquid micro template, we are using a loop to output every image associated with the currently viewed product. Let's break it down into steps to fully understand it.
Step 1: {% for image in product.images %}
Our opening line introduces us to the idea of collections in Liquid. Unlike product collections which we looked at in part one collections in Liquid are different. It's an unfortunate naming convention in this respect so I like to refer to collections in Liquid as Liquid collections to avoid confusion.
A Liquid collection in Shopify themes can take many forms but a good example is product.images as used above. A Liquid collection is easy to spot as it normally takes the plural form - as in images above. In our example we are dealing with a Liquid collection of all the images associated with a product.
Another example is product.variants. This would return an object containing details of all the product variants ready to loop over in our template. If you need a primer on product variants we discussed it in part one.
You'll also notice that we are using the word image to denote the current item in the loop. Each time we go round our loop image will give us access to the data associated with each image in turn. Naturally this will be different on each loop.
It's also worth noting that we don't need to know how many loops will occur. After there are no more images to loop over Shopify will carry on and render the next part of the template.
Step 2: <img src="{{ image | product_img_url: 'medium' }}" />
The second line of our code is part HTML and part Liquid. You'll notice that the src attribute is populated with a Liquid output tag. We'll look at filters, denoted by the | character, next but this short construct will populate the src attribute with the fully qualified URL to the "small" version of the current image in our loop.
Step 3: {% endfor %}
The final line of our example is our closing endfor statement. This effectively closes off any code that will be rendered within the loop.
If we had three images in our product.images object the final output would look like this:
<img src="//cdn.shopify.com/s/files/1/0222/9076/products/il_fullxfull.296506684_small.jpg?v=1368007899" alt="" /><img src="//cdn.shopify.com/s/files/1/0222/9076/products/moustache-mugs_by_peter-bruegger_1_small.jpg?v=1370429684" alt="" /><img src="//cdn.shopify.com/s/files/1/0222/9076/products/tumblr_lhr5huUxXL1qfhlb1o1_500_small.jpg?v=1370429684" alt="" />
Loops are really useful and something you will encounter daily in your theme development. Outputting images and product variants are two commonly found examples.
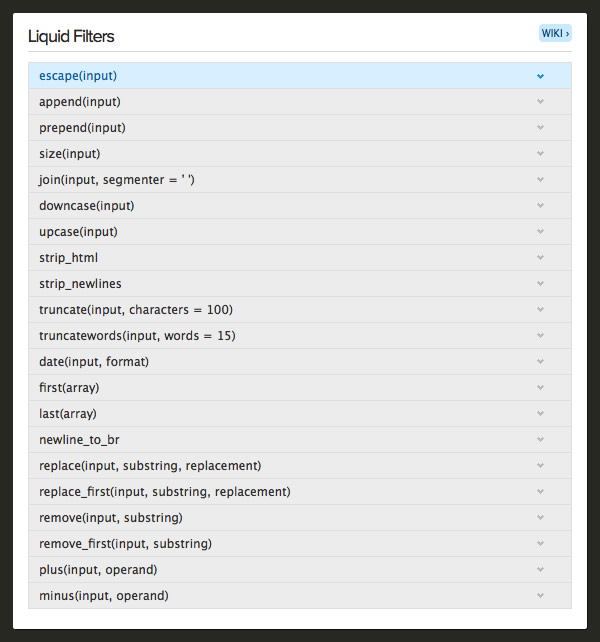
Filters
I mentioned filters in relation to our loop example earlier so let's go into a little more detail and look at how they work.
Filters are used in conjunction with an output tag. Their purpose it to manipulate the data in some way so that it's format changes. A great example is the date filter:
{{ article.published_at | date: '%d %B %Y' }}Without the filter Shopify would simply output the date the blog article was published at in the format it is stored in the database - which may not be humanly readable. However by adding in the | and including the date filter we can manipulate the format ourselves.
We start on the left with a piece of data, in this case a date, and by using the filter it comes out the other side changed. This, in essence, is the sole purpose of a filter. It takes a piece of data and somehow manipulates it so that its form changes.
Here's another example:
{{ 'style.css' | asset_url | stylesheet_tag }}Here we are using two filters with the ultimate aim of creating a fully formed style element in our layout file.
We start on the left with the name of the our CSS file and first apply the asset_url filter. This is an incredibly useful filter. As we have no idea where our style.css file is located on the Shopify network (other than in our assets folder within our theme) we need a way for Shopify to fill in the path to the file.
This is the purpose of the asset_url filter. It will take the name of our file, style.css in this example, and prepend the full path to your store's assets folder. It's worth noting that it doesn't check to see that the file exists.
Here's how that might look when output:
//cdn.shopify.com/s/files/1/0222/9076/assets/style.css
The final filter in the chain, stylesheet_tag, takes this URL and wraps it in a style element which is then output in our layout file. Here's the final result:
<link href="//cdn.shopify.com/s/files/1/0222/9076/t/10/assets/style.css?756" rel="stylesheet" type="text/css" media="all" />
Each filter takes the output from its preceding filter and in turn modifies it. When there are no further filters to pass data into, the result is output as HTML into the template.
There are many really useful filters, here are just a few you'll find yourself using:
- asset_url
- stylesheet_tag
- script_tag
- date
- pluralize
- replace
- handle
- money& money_with_currency
- product_img_url
- link_to
Next Steps
In this tutorial we've gone over quite a bit of ground. We've looked at Liquid and its relationship to our HTML micro templates and layout files, and looked at four key concepts - output, logic, loops and filters.
A great next step would be to open up a free Shopify Partner account and start dissecting a theme for yourself. Many of the examples used in this tutorial are taken from my exceedingly bare bones starter theme which is available on GitHub.
In preparation for part three I recommend you download a copy and apply it to a development store. Full details on uploading a theme are available in the Shopify docs. It's literally as simple as uploading a ZIP file. Have a play with the template editor in your development shops admin, change a few tags, apply a filter or two and add elements into the layout file to see how things change.
In the final part of this short series I'll introduce you to some more advanced ideas that will demonstrate how flexible Liquid and Shopify can be. We'll look into how they enable you to make your themes really sing using examples from my own projects and other well known Shopify stores.
