In this new tutorial, we’ll learn how to implement smooth scrolling in our web pages. We’ll start with a common jQuery approach for creating this functionality. Then, we’ll get rid of jQuery and discuss two pure JavaScript solutions.
Just to give you an idea of what we’ll discuss during this tutorial, check out one of the demos we’ll be building:
Let’s get started!
1. Begin With the HTML Markup
For demonstration purposes, we’ll define a header wrapped within a container and four sections. Inside the header, we’ll specify a navigation menu and an introductory text.
Each section will have an id whose value matches the href value of a menu link. This association (what we refer to as a fragment identifier) will allow us to jump to specific parts of our page.
The CSS part will be pretty straightforward, nothing extraordinary.
First, we’ll use CSS Grid to layout the page header. The menu will cover one-fourth of the available width, while the text the remaining three-fourths (the responsive stuff isn’t really important here):
Coming up next, we’ll apply some styles to the sections. Most importantly, we’ll ensure that they will be tall enough, so there’s adequate scrolling inside the page for the effect:
That’s all we need so far! If we now click on a specific link, we’ll immediately jump to the relevant page section.
Check our our initial demo:
Basic HTML stuff, right? Let’s now take it a step further and learn how to navigate to the sections smoothly.
3. Smooth Scrolling With jQuery
We’ll start with the popular jQuery approach. To create smooth scrolling with jQuery, we’ll take advantage of its animate() method.
Each time we click on a navigation link, we’ll do the following things:
Cancel its default behavior to jump to the corresponding section.
Grab its href attribute value.
Smoothly navigate to the associated section by animating the scrollTop property. Note that the animate() method allows us to adjust the animation speed. In our case, the animation will last 800ms.
First, we’ll use the scroll() method. The logic for this approach is similar to the previous jQuery implementation.
The trick here is that inside this method, we’ll determine the scrolling behavior via the behavior configuration property. Possible values are auto (default) and smooth. As soon as we set its value to smooth, the magic will happen and we’ll be able to navigate to the target section smoothly.
It’s worth mentioning that at the time of this writing, there isn’t any speed option defined in the specification for manipulating the animation speed. If that doesn’t work for your needs, you might have to extend the native functionality by writing custom code.
Here’s the required code:
const links = document.querySelectorAll(".page-header ul a");

for (const link of links) {
  link.addEventListener("click", clickHandler);
}

function clickHandler(e) {
  e.preventDefault();
  const href = this.getAttribute("href");
  const offsetTop = document.querySelector(href).offsetTop;

  scroll({
    top: offsetTop,
    behavior: "smooth"
  });
}
Tip: Instead of the scroll() method, we could equally have used the scrollTo() and scrollBy() methods. The effect should look the same.
Beyond the aforementioned scroll methods which are attached to the window object, there’s also the scrollIntoView() method which applies to DOM elements. This can accept as well the behavior property with the value set to smooth.
Here’s the code needed for this implementation:
const links = document.querySelectorAll(".page-header ul a");

for (const link of links) {
  link.addEventListener("click", clickHandler);
}

function clickHandler(e) {
  e.preventDefault();
  const href = this.getAttribute("href");

  document.querySelector(href).scrollIntoView({
    behavior: "smooth"
  });
}
The related demo:
Polyfills Please?
Native smooth scrolling is great, yet as with many other new CSS goodies, it lacks wide support. If browser support is important for you, you can take a look at the Smooth Scroll polyfill developed by Dustan Kasten.
To include it in your projects, grab it from a CDN, then insert it as a script tag before your JavaScript code.
Here’s one of our aforementioned JavaScript demos with the polyfill embedded:
For example, with this polyfill, the animation in browsers like Microsoft Edge 18 and devices like iPad Mini 4 should work as expected.
Conclusion
That’s it, folks! Today we covered a JavaScript tip which helps us achieve smooth scrolling without using any external library.
I hope you found this exercise useful and have enhanced your JavaScript knowledge a little bit. If you have ever built something similar in the past, please share it with us in the comments below!
Challenge: before closing, I have a small challenge for you! Your job is to extend one of our JavaScript demos by including a “back to top” button. The final functionality should work like this demo. Do you accept the challenge? If so, I’d be glad to see your solution in the comments below!
Are you looking for a reliable WordPress help-desk plugin? Solving issues related to your products on time will lead to happy clients and customers. In this post, I'll show you some of the best WordPress plugins for creating and running a help desk.
Why Do You Need a Help Desk?
A professional help desk will help you address your customers questions and technical problems in a fast, reliable, and timely manner.
It will help you organise customer complaints and queries in the order they come in, assign them a ticket, and finally redirect them to the right department for help.
It will also help you look up customer queries using a ticket number so you can inform customers about the progress of their queries.
A well run help desk will leave your customers satisfied, which will in turn translate into repeat business.
Top Selling WordPress Help Desk Plugins for 2020 on CodeCanyon
The Knowledge Base WordPress plugin helps you build a customer self-service help desk in
minutes. Create resources with helpful articles and answer frequently asked questions. Users of this plugin create customer support
centers, FAQs, product or service documentation, internal
company documentation, wikis, and much more.
TotalDesk is a comprehensive,, all-in-one help desk solution for WordPress. Features include: ticket and notification system, live chat, knowledge base, and reports.
The MinervaKB knowledge base plugin comes with a powerful WordPress FAQ module with instant filtering and categories. It is easy to customize and comes with unlimited design options. You can restrict content and show teasers. You can also integrate top plugins like WPML, Elementor, and Visual Composer.
FAST is a professional support ticket system that is easy for your customers to use. It will give you and your team up-to-the-minute updates using email and Slack notifications.
The makers of FAST use it themselves to provide support tickets for their 20,000 plus customers on ThemeForest and CodeCanyon. It’s so fast, it’s like chatting to your customers!
With Helpy you can create a knowledge base that is accessible only by your customers. In addition, you can create an internal wiki for your team or a Wikipedia-like website with front-end editing and publishing capabilities. And finally you can create documentation for your WordPress websites. The documentation can be technical documentation or product documentation for your end users.
The Atlas knowledge base plugin helps you create a self-serve online library of information about a product, service, department, or topic, helping you to reduce your support volume and increase customer satisfaction. Atlas comes with a modern look and feel and two beautifully designed, mobile-ready themes to match your brand.
The Support Board plugin helps you automate your customers’ communication with artificial intelligence-driven bots and a chat system integrated with the most-used platforms. Save time and use the software you already know and love. Communicate with your customers directly in Slack. Connect Dialogflow and use rich messages on the fly.
The WooCommerce Support Ticket System seamlessly integrates into your WooCommerce installation, adding a system to manage user and order support tickets. In this way the shop admin can easily track and give support for orders and users' issues!
Note:This plugin, like the latest versions of WordPress, requires PHP version 5.5 or higher.
Sabai
Discuss is an ideal tool for building a knowledge base and a help desk
portal for your WordPress website. You
can also use it to build a community-driven question-and-answer website
similar to Yahoo Answers and Stack Overflow.
Knowledgebase X is an advanced WordPress knowledge base plugin with FAQ, glossary and AI-powered chat bot help desk features all in one. It easily allows you to build a robust self-service support system that will help significantly reduce live support time. It supports file attachment, alternative questions for articles, upvotes, downvotes, and a lot more!
The chat bot can be integrated with Google’s DialogFlow AI and NLP engine.
Multi Helpdesk Pro is perfect for those entrepreneurs who want to host their own support ticket system service, where companies all over the world can host their help desks. With this plugin, you could build a business of hosting and supporting help desks.Try out the support ticket system business model!
Pinky Chat is a live chat application and help desk software for your websites. As a faster way to quickly handle your customer service, you can talk to your customer in real-time over the web. Additionally you can track analytics of your website, visitor’s path, and geolocation details. Finally, the live chat widget works with any website: static HTML websites, WordPress, OpenCart, Joomla, Drupal, or PHP scripts.
Forym has many powerful features that allow you to create a professional looking help desk or forum with ease! Users can ask and receive answers from fellow users.
The forum is created to work on the front-end of your website but admins are able to manage all forums, topics, replies, categories and tags from the admin area as well.
5 Free WordPress Help Desk Plugins
In case your current budget does not allow you to buy one of these premium help desk plugins, I have collected a list of five of the best free help desk plugins available.
SupportCandy adds the features of a complete help desk ticket system to WordPress. With this easy to use and easy to configure plugin, you get simplicity, functionality and extendability.
JS Help Desk is a trusted open source ticket system. JS Help Desk is a simple, easy to use, web-based customer support system. Users and guests can create tickets from the front-end. JS Help Desk comes packed with a lot of features—more even than some expensive (and complex) support ticket systems. The best part is, it completely free.
WordPress Advanced Ticket System is a complete support ticket system for WordPress. This allows users to submit tickets to report problems and set the status, priority, product, and type of each ticket. In this plugin, registered users can submit a ticket through the admin and unregistered users do ticket submission through via the shared guest user feature.
WSDesk allows you to turn all your customer complaints turn into trackable tickets so you manage your customer queries seamlessly.
WSDesk comes with all the basic features required to set up an online-support: ticket creation & management, email piping, unlimited agents, unlimited tickets, customizable email reply, complete ticket history, file attachment to tickets and much more!
KB Support is the ultimate WordPress plugin for providing support and helpdesk services to your customers.
Enriched with features, you can be sure that right from activation, KB Support will provide the perfect help desk solution for your agents to support your customers.
The built-in knowledge base allows customers to find solutions to their issues during the ticket submission process, reducing the overall number of support queries received by your help desk.
Before Setting Up a Help Desk
Carry out an honest appraisal of your internal and external communications, define your goals, then choose what plugin that will work for you. The aim should always be to provide the best support to your customers.
Appraisal of Internal Communication
How are your internal communication processes?
What tools do you use to communicate internally?
Where do they succeed and where do they fail?
How do you assign tasks to each member of the help desk team?
How can you improve this process?
Appraisal of External Communication
Take a close look at your communication channels with customers.
What channels are available for customers to reach you with their problems?
How do you communicate with your customers about their queries?
Be honest when assessing how effective these channels are.
Define Your Help Desk Goals
First, think about your help desk team.
How many help desk staff do you need?
How do you want to organize your help desk team?
What problems do you want to solve?
Then you can document and define your help desk processes and workflows.
Make a list of all technical issues you anticipate.
Build detailed help desk workflow.
Identify repetitive help desk tasks that can automate.
Have a detailed knowledge base for internal use by help desk staff.
Create a knowledge base for problems customers can solve by themselves.
Identify metrics you will use to define and track success.
Things to Consider When Choosing a Help Desk Plugin
Budget
See what each help desk software fits within your budget and offers must-have features. Also make sure you look at free software. Free does not necessarily mean limited!
Features
Know exactly what features your want. That way you can leave out systems that will not serve your needs. The most important is to understand how detailed you want your ticketing system to be and how much control you want to have. Always make sure your ticket system can integrate with email and can also send SMS for customers that prefer it.
Customization
The ability to customizing the help desk system to the look of your brand is important. You should be able to personalise all templates that the system comes with. This means adding your business name, logo, and colors on the tickets and emails etc.
Ease of Use
The point of a help desk is to make processes faster and easier. If the system you choose is difficult to use it will slow down your help desk agents and you will not deliver fast, reliable service to your customers.
Web Interface
Allows customers to log into the service portal and check the progress of their tickets. This front-end interface should look good to build confidence in your product.
Security
There is a lot of customer data goes back and forth through your ticketing system. Make sure the system you are considering uses strong encryption.
Launch Your Help Desk Today With a Great WordPress Help Desk Plugin
You can purchase one of these high-quality WordPress help desk plugins on CodeCanyon and create a fantastic technical support experience for your customers.
The following articles by my colleagues will help you discover more options to help create the help desk that fits the needs of your business and customers.
Having a website for your accounting and bookkeeping practice is essential if you want to get more clients. Creating a website might seem difficult but with a platform like WordPress, you can quickly launch your website even if you don’t know how to code.
What’s more, if you use a WordPress theme made specifically for accountants and bookkeepers, you’ll have an even easier time getting your website up and running.
Find The Best Accounting WordPress Themes on ThemeForest
One of the top places to find the best WordPress accounting and bookkeeping themes is ThemeForest. This marketplace allows you to purchase single-use accounting firm website templates for WordPress, customize them to your needs, and launch your website quickly.
The bookkeeping themes for WordPress from ThemeForest have an attractive design that looks good on all devices and they have tons of features needed to create a powerful accounting and bookkeeping website.
The Accountant theme opens up our list strong with a variety of pre-made homepage layouts for both one-page and multi-page websites. On top of pre-made homepages, the theme also has a number of inner pages that you can use as a starting point for your website. It’s also fully responsive and easy to customize.
The Finance theme has a modern and clean design. It’s responsive, retina-ready, and easy to customize. You’ll find a number of pre-made homepage layouts that you can import with a single click, custom icons, and Bold Builder which is a drag and drop page builder that you can use to quickly create visually stunning pages.
Accounting - Business, Consulting and Finance WordPress theme
The Accounting WordPress theme has a professional design. It comes with the WPBakery Page Builder plugin so you can use its drag and drop interface to design your pages and add elements such as buttons, accordions, images, and more.
The theme is also responsive and includes 10 premade demos that you can import with a single click to speed up the setup process.
The Consultancy WordPress theme stands out from the rest thanks to the huge stock image collection included in the theme.
You’ll find 450+ stock photos suitable for the finance industry as well as premade page demos. The theme is fully responsive and was optimized to load fast.
This theme has 5 pre-made demos and is fully responsive and retina-ready. The theme has a powerful theme options panel so you can easily customize every aspect of your website. It also includes a number of premade inner pages.
The Gaap theme has a clean and professional design. It’s compatible with the Site Origin Page Builder plugin so you can easily use it to create unique page layouts. The theme is responsive, optimized for SEO, and easy to customize.
Consulting - Business, Finance WordPress Theme For Accounting Websites
If you’re looking for an easy-to-use theme, look no further than Consulting. It’s compatible with both WPBakery and Elementor page builder plugins. It’s also responsive and includes 40+ demos that are ready to be imported with a single click.
Partner - Accounting and Bookkeeping Responsive WordPress Theme
The Partner theme is a perfect choice for accounting and bookkeeping websites with its professional and sophisticated design.
The theme comes with multiple homepages to choose from, 900+ custom icons to spice up your website visually, and email sign up forms that are compatible with MailChimp and Campaign Monitor.
The Auditing theme has a clean and modern design with a plethora of premade inner pages. The theme integrates with MailChimp so you can easily build a list of potential clients. It’s fully responsive and easy to customize. On top of that, it has been optimized for SEO and fast loading times.
Tax Help | Finance & Accounting Adviser WordPress Theme
This theme is perfect for any accountant specializing in tax returns. The theme has a vibrant design and it’s easy to customize.
You’ll find dozens of premade shortcodes and built-in appointment scheduler so you can easily book clients for their tax return consultation and filing. This theme is also fully responsive, SEO optimized, and translation-ready.
This theme has a minimalist and simple design. It’s fully responsive and easy to use thanks to premade page templates that you can import with a single click.
You can also customize colors, fonts, upload your logo, and every other aspect of your theme thanks to the powerful theme options panel and Live Customizer.
PrimeInvest - Finance WordPress Theme For Accountants And Bookkeepers
PrimeInvest is a contemporary theme designed specifically for all modern finance and accounting websites.
The theme comes with stunning elements and layouts made specifically for finance businesses. It’s also compatible with the Elementor page builder and easy to customize.
The Strong theme comes with an easy to use page builder plugin. You’ll also find 300 premium blocks that you can use to add various sections to your website pages. The theme is fully responsive and easy to customize.
Blink - Finance and Accounts Business WordPress Theme
The Blink theme has a trendy and clean design. It comes with a complete package of page demos that you can use as a starting point. You can import them with a single click and customize them to match your branding. The theme is also responsive and optimized for SEO.
Finance - Business & Financial, Broker, Consulting, Accounting WordPress Theme
This theme has a professional look and feel. It has plenty of space to include all the different accounting services you provide. You can also include testimonials from past clients. The theme is easy to use and customize and it’s also fully responsive.
The BiziPress theme has a clean and modern design with two homepage layouts to choose from. The theme is fully responsive and you can customize fonts, colors, and other visual aspects of the theme. It’s also optimized to load fast and coded with SEO in mind.
Finance Business - Company Office Corporate Theme For Accounting And Bookkeeping Websites
This theme has a bold and trendy design. You can easily customize the page layouts using the Visual Composer page builder plugin and change colors, fonts, and more using the theme options panel.
This theme allows you to easily showcase your services and feature client testimonials. It’s also fully responsive.
Xzopro - Bookkeeping Finance And Business WordPress Theme
If you’re looking for a theme with a corporate look and feel, this theme fits the bill perfectly. You can showcase your services and choose between three different homepage layouts. The theme is also fully responsive and easy to customize.
The Upscale theme has a clean and modern design with plenty of white space. It allows you to easily showcase your services, share testimonials from past clients, and feature your team members. It’s also easy to customize and fully responsive.
Top Free Accounting WordPress Themes
If a premium theme is not in the budget, a free accounting WordPress theme is a good place to start. You can find plenty of free themes on the official WordPress theme repository but keep in mind that free accounting WordPress themes are often limited in features and customization options.
That said, here are the top five free accounting WordPress themes to check out.
This theme has a simple and clean design. It has a large header area where you can include a call to action. The theme is responsive and you can customize fonts and colors.
This theme has a corporate look and feel. The homepage has three feature boxes that you can use to showcase your services. You can also share customer testimonials. The theme is responsive and you can upload your own logo and customize colors and fonts.
This free theme has a large header area and a call to action that sits just below it. You can also showcase other accounting services or packages. The theme is responsive and can be customized using the Live Customizer.
The Bluechip theme has support for popular WordPress plugins like Yoast SEO and Contact Form 7. It’s responsive and allows you to upload a custom logo as well as a custom background. You can also use the Customizer to change the colors and the fonts.
This theme has a clean design. You can use it for accounting or bookkeeping websites and display your services as well as share testimonials from past clients. The theme allows you to customize fonts and colors and upload your logo.
Five Quick Tips for Accounting Websites
Choosing the right theme for your accounting website is only the first step. Once you have found the perfect accounting WordPress theme, you need to customize it and add your content to it. Here are five quick tips that will help you design a stellar accounting website.
1. Make Your Call To Actions Stand Out
Your website should make it very clear what you want visitors to do and the best way to do that is to include a call to action on every page. Be sure to give your calls to action a contrasting color that stands out from the rest of your site.
2. Trim Your Website Copy
Most people nowadays skim and scan through your website pages and blog posts. As such, it’s better to keep your website copy short and to the point. Use short paragraphs, bullet points, and break up sections with headings to make sure the copy is easy to read.
3. Don’t Forget White Space
White space or negative space refers to the amount of space around each object. By leaving plenty of white space around objects, you’ll give your website content a chance to breathe and visually guide visitors down your page.
4. Use High-Quality Images
Make sure you use high-quality images throughout your website. This will add visual appeal to your website, especially if you use images of your actual employees and offices, instead of generic stock photos.
5. Customize With Your Colors And Fonts
The last tip is to use your brand colors and fonts to customize how your website looks. This is one of the best ways to make sure your website stands out from the competition so be sure to take advantage of the theme customizer.
Launch Your Accounting Website Easily With An Accounting And Bookkeeping WordPress Theme
Creating an accounting website is not difficult when you have the right tools for the job. If you’re ready to create a professional website for your accounting and bookkeeping business, head on over to GraphicRiver and browse our collection of WordPress themes to find the best accounting WordPress theme for your website.
A landing page on your WordPress site is an invaluable tool if you want to sell something or get visitors to sign up. In this post you'll learn how to create a landing page in WordPress for free, and encourage people to buy or sign up to your service.
We'll be creating a landing page by customizing a third-party WordPress theme. That is the best way to create WordPress a landing page for free, and gives you the greatest flexibility, but it requires some coding know-how. If you want to create a landing page without coding, check out some of our other posts.
A landing page is a key page, designed to get users to take action. What that action is depends on your business, but it’s likely to be one of two things:
buy something, probably a big ticket item as you’d be using product pages for smaller products
register for something, which might be a subscription to a service or course, or a mailing list
You’ll need to get as much traffic to this page as you can, as it’ll be an important one for your site. You might do that via SEO, advertising or direct marketing. Or maybe a combination.
But once people have arrived at that landing page, you need to make sure they buy or sign up.
The content of the page will be part of how you do this—not only the content itself, but the way you lay it out. Generally, the more expensive the item, the more text and the more calls to action you’ll need.
But it’s not just about the content. You also need to make sure that when someone lands on that page, the only option available to them is to click the buy button. If there’s a navigation menu, or some widgets, or a clickable logo, there’s a chance they could click away to investigate the rest of your site, and never come back to the landing page.
Which is where creating a landing page in your theme comes in. A landing page will have no links outside the content. There’s be no menu, no widgets, and no clickable links in the header, footer, or anywhere else. It’ll normally be full width (as you won’t need your sidebar widgets) and it’ll have a clean layout designed to focus attention on the content.
In this tutorial, I’ll show you how to create a landing page template for your theme. This consists of three things:
creating a page template for your landing page
creating a header for the landing page with no links
creating a footer for the landing page with no links
using the template to create your landing page
So let’s get started. I’m going to create this landing page template for the twenty twenty theme, and that means creating a child theme so I’m not editing a third party theme.
a testing or development installation of WordPress
a code editor
a theme installed
So let’s get started.
Create a Child Theme
If you’re working on your own theme, you can skip this section. But if you’re using a third-party theme you downloaded from the theme directory or that you bought from ThemeForest or another source, you’ll need a child theme.
Now you need to create a page template which will be your landing page template. You’ll need to duplicate whatever template is being used for pages in your theme and rename the new file. For many themes, that’s page.php. For twenty twenty, that’s singular.php. You can use the WordPress template hierarchy to work out which template file is being used.
If your working with a child theme, you’ll copy your duplicate to the child theme. If you're working in the main theme, save the duplicate in the main theme. Note: don’t do this on your live site!
If your theme has a full width page template, use that instead of page.php, as the layout will be already set up for the page to have no sidebar, and the sidebar will have been removed.
I’ve named my file landing-page-template.php. Don’t give it a name that begins with page. If you then create a page with that name, WordPress will automatically assign the template to that page. Better to keep things manual so you have more control.
Here’s the full content of my new landing-page-template.php file. Yours will look different if you’re working with a different theme.
<?php
/**
 * The template for displaying single posts and pages.
 *
 * @link https://developer.wordpress.org/themes/basics/template-hierarchy/
 *
 * @package WordPress
 * @subpackage Twenty_Twenty
 * @since Twenty Twenty 1.0
 */

get_header();
?><main id="site-content" role="main"><?php

	if ( have_posts() ) {

		while ( have_posts() ) {
			the_post();

			get_template_part( 'template-parts/content', get_post_type() );
		}
	}

	?></main><!-- #site-content --><?php get_template_part( 'template-parts/footer-menus-widgets' ); ?><?php get_footer(); ?>
Now it’s time to edit the file. Start with the commented out text at the top. Replace it with the text needed for page templates:
<?php
/**
* Template Name: Landing Page
*
*/
The next step is to remove any call for the sidebar or footer. How you do this will depend on your theme and on whether you used a full width template to start with.
In twenty twenty there’s no call to the sidebar, so I don’t need to remove that. If you have this line in your template, you’ll need to remove it:
<?php get_sidebar(); ?>
Note: You might find once you’ve finished editing this template file that the layout leaves a gap where the sidebar should be. Edit the CSS for the template or change the classes in the content section to make it full width.
Now for the footer. You don’t want to remove the footer altogether as you still need your colophon and your call to wp_footer, so instead of removing the get_footer() call, you’ll leave it there and create a new footer file for your landing page.
In twenty twenty, the footer doesn’t work in the standard way. There are two calls in my template file:
The first one calls an include file that has nothing but widgets. The second one calls the footer which I need, but we’ll be editing it later. So I’ll just delete this line:
Note: the classes I’ve used above are specific to twenty twenty. Edit them to reflect your theme.
If your theme works in a more standard way than twenty twenty, you’ll probably find that this code is already there. All you have to do is remove any <a> elements surrounding it, so that site title or log is still there, but they don’t act as links.
Remove the Navigation Menu h3
Now it’s time to remove the navigation menu. Find the code for it in your header filer. In twenty twenty it’s inside an element that looks like this:
Remove those, making sure you don’t remove the site title and description which is between them. If your theme has anything similar, remove that.
Remove Any Widget Areas or Other Code with Links
Twenty twenty also has code for search, which I’ll remove as well. Your theme may have this in a widget, in which case remove any widget areas in the header file.
And finally, in twenty twenty there’s a modal menu at the end of the file which I also want to remove. Again, your theme may not have this—twenty twenty is more complex than many!
My header-landing.php file now looks much simpler:
Save the file and go back to your template file. Find the line that calls the header:
get_header();
Edit it so it calls the new header file:
get_header( ‘landing’ );
Now save your file.
Create a Footer for the Landing Page
Now it’s time to create a footer for your landing page.
Make a duplicate of footer.php and call it footer-landing.php. Open your new file.
Find any code for widget areas and remove that. Twenty twenty doesn’t have widget areas in the footer.php file, they’re in an include file which I already removed the call to.
You’ll also need to edit the colophon, to remove links. Here’s the colophon in twenty twenty:
Save your template file and if you’re working with a child theme, activate it in the WordPress admin.
Use the Template to Create your Landing Page
Create a new static page for your landing page, giving it a title that’s appropriate to what you want it to do.
Create the content and then in the Page Attributes section of the Document pane on the right, select Landing Page in the Template dropdown.
Publish the page.
Now when you visit it in the front end, you’ll find that it has no links or navigation and that the only thing people can click on the page is your call to action button.
Summary
A landing page is much more powerful if you make sure that the only action people can take when they arrive at it is to click your ‘buy’ button. By creating a landing page template in your WordPress theme, you’ll make your lading page more effective and get more sales or subscriptions.
Follow this guide and you’ll have a powerful landing page for your theme!
Time for a practical exercise in flexbox! In this tutorial we will use flexbox to create a mobile-first, responsive, toggleable navigation bar with different layouts for mobile, tablet, and desktop screens.
Note: This tutorial has been updated to include a responsive submenu and pure JavaScript instead of jQuery.
Flexbox is Perfect for Responsive Navigation
Flexbox is a versatile layout module with which we can create one-dimensional layouts that require flexibility, such as responsive menus. Using flexbox’s ordering, alignment, and sizing properties, we can build navigation bars that adapt their layouts to the viewport size while keeping the HTML outline logical and accessible.
In this tutorial, we’ll look into how to create a responsive navigation bar with flexbox. Our flexbox navigation will have three different layouts, depending on the viewport size:
a mobile layout in which only the logo and a toggle button will be visible by default and users can open and close the menu using the toggle,
a tablet layout in which we will show two call-to-action buttons between the logo and toggle in the default state and the rest of the menu will remain toggleable,
a desktop layout in which all the menu items, except for the toggle button, will be visible on the screen.
We will use media queries to detect the viewport size of the user’s browser. Our responsive navigation bar will be mobile-first, so we will create the mobile layout first. Then, we will add the tablet- and desktop-specific CSS using min-width media queries.
The navigation bar will also have a JavaScript-based dropdown submenu that opens and closes when the user clicks the parent menu item.
Here’s how the menu will look on mobile:
Here’s the tablet version:
And, this is how it will look on desktop:
You can also test, fork, and play around with the interactive demo on CodePen:
New to Flexbox?
If you aren’t used to flexbox, or need a refresher, these beginner guides will give you all the skills you need to complete this tutorial:
The HTML is a simple <ul> list, as you can see below. The .menu class will be the flex container and the list items will be the flex items. Their order will adapt to the viewport size of the user’s device. For example, the Log In and Sign Up buttons will come first on mobile, but will be displayed at the end of the menu on desktop. We will achieve this effect by making use of flexbox’s ordering properties.
You have probably noticed that menu items with a submenu (“Services” and “Plans”) have an <a> tag without an href attribute. We do this because these “empty” parent menu items don’t lead to any other page–they just open and close the submenu. Using the anchor tag without href is permitted and prevents the page from jumping up on small screens when the user clicks the empty menu item to open or close the submenu.
We also add the tabindex="0" attribute to <a> elements without a href attribute. This is because empty <a> tags are omitted from the default tab order, so we need to put them back to the tabbing order with the tabindex attribute to keep the menu keyboard-accessible.
Note: the toggle button at the end of the list uses a Font Awesome icon. To make the demo work, you’ll need to add the Font Awesome library to the <head> section of the HTML document from CDN using the code below. (If you want to make the menu work offline, you’ll need to host Font Awesome locally.)
As our navigation will be mobile-first, we start with the mobile layout. Most responsive flexbox menus use column-based layouts for mobile, as menu items can be quickly packed below each other by adding the flex-direction: column; rule to the flex container. Even though this is an excellent solution, we won’t use it in our example.
Instead, we will create a wrapping, row-based layout for mobile so that we can display the logo and toggle button next to each other on top of the menu.
The CSS trick here is that we make regular menu items such as Home and About span across the entire container using the width: 100%; rule. So, flexbox will display them below each other, while the logo and toggle will retain their natural sizes and sit on top of the navbar in the same row.
In the CSS below, we also use the justify-content and align-items properties to align the flex items horizontally and vertically. Besides this, we hide the .item elements using the display: none; rule. Menu items will be only revealed when the user clicks the toggle button. The .active class is not in the HTML code, we will dynamically add it with JavaScript.
/* Mobile menu */
.menu {
    display: flex;
    flex-wrap: wrap;
    justify-content: space-between;
    align-items: center;
}
.menu li a {
    display: block;
    padding: 15px 5px;
}
.menu li.subitem a {
    padding: 15px;
}
.toggle {
    order: 1;
    font-size: 20px;
}
.item.button {
    order: 2;
}
.item {
    order: 3;
    width: 100%;
    text-align: center;
    display: none;
}
.active .item {
    display: block;
}
.button.secondary { /* divider between buttons and menu links */
    border-bottom: 1px #444 solid;
}
As you can see above, we have also changed the order of menu items with the help of the order property. Our HTML outline follows a logical order. This is how we want screen reader users and search engine bots to go through the menu.
However, in the mobile layout, we want to show the logo and toggle button on top of the menu. We also want to display the two call-to-action buttons (“Log In” and “Sign Up”) before regular menu items. So, we set up the following order:
.logo gets the order: 0; value, as it will be the first item (however, as this is the default value of order, we don’t need to add it to the CSS),
.toggle gets 1, as it comes right after .logo,
.item.button belonging to the Log In and Sign Up buttons gets 2,
and .item belonging to the rest of menu items gets 3.
4. Style the Submenu
As this is mobile-first navigation, we’ll primarily style the submenu with mobile screens in mind. This is a great technique, as it’s usually harder to create a user-friendly submenu for small screens than for larger ones. Then, we can use the same submenu layout for tablet screens as well. For desktop, we’ll only need to change the positioning of the submenu.
By default, the submenu is set to display: none; and will be only revealed when the user clicks the parent menu item. We will add the required JavaScript functionality in the next two steps before moving on to the tablet menu.
As you can see above, now we add the Font Awesome icons using CSS instead of HTML. These icons we add using the ::after pseudo element will be the little down arrows shown next to each menu item that has a submenu.
If you remember we added the Font Awesome icon for the toggle button with HTML in Step 1. This is because the toggle button will be targeted with JavaScript, so it has to be present in the DOM. However, the down arrows here are just style elements that indicate the presence of the submenu. Since no functionality relies on them, it’s better to add them with CSS.
5. Add the Toggle Functionality with JavaScript
We’ll set up the toggle functionality by adding a click event listener to the toggle button that opens and closes the menu on mobile. In the JavaScript code, we will use the ES6 syntax that gives us access to the const and let notation and the for...of loop and already has good browser support.
For the custom JavaScript, create an empty script.js file and add it to the HTML before the closing </body> tag:
<script src="script.js"></script>
And here’s the JavaSript code responsible for the toggle functionality:
const toggle = document.querySelector(".toggle");
const menu = document.querySelector(".menu");

/* Toggle mobile menu */
function toggleMenu() {
    if (menu.classList.contains("active")) {
        menu.classList.remove("active");

        // adds the menu (hamburger) icon
        toggle.querySelector("a").innerHTML = "<i class=’fas fa-bars’></i>";
    } else {
        menu.classList.add("active");
        // adds the close (x) icon
        toggle.querySelector("a").innerHTML = "<i class=’fas fa-times’></i>";
    }
}

/* Event Listener */
toggle.addEventListener("click", toggleMenu, false);
First, we select the menu and the toggle button using the querySelector() method so that we can access them with JavaScript.
Then, we add the custom toggleMenu() function that will be called when the toggle is clicked.
Lastly, we add the event listener that will be listening to the click event using the addEventListener() method.
6. Add the Dropdown Functionality with JavaScript
Now, when the user clicks the toggle button, the menu is activated and deactivated, however, the submenu is still hidden. We will add this functionality with the following JavaScript:
const items = document.querySelectorAll(".item");

/* Activate Submenu */
function toggleItem() {
  if (this.classList.contains("submenu-active")) {
    this.classList.remove("submenu-active");
  } else if (menu.querySelector(".submenu-active")) {
    menu.querySelector(".submenu-active").classList.remove("submenu-active");
    this.classList.add("submenu-active");
  } else {
    this.classList.add("submenu-active");
  }
}

/* Event Listeners */
for (let item of items) {
    if (item.querySelector(".submenu")) {
      item.addEventListener("click", toggleItem, false);
      item.addEventListener("keypress", toggleItem, false);
    }
}
Here, we add the .submenu-active class to each menu item with a submenu when the user clicks it.
First, we select all menu items with the querySelectorAll() method that returns a node list (rather than a single element like querySelector()).
In the custom toggleItem() function, we add and remove .submenu-active to/from the clicked element. Note that in the else if block, we remove the class from every other menu items that were previously opened. This way, it won’t happen that two submenus are open at the same time, as they can cover each other on desktop.
Finally, we loop through the items classList using a for...of loop. Within the if block, we add two event listeners to menu items that have a submenu: one for the click event for regular users who access the menu by clicking or tapping, and one for the keypress event for keyboard users.
7. Create the Tablet Menu
We’ll create the tablet layout using a min-width media query. On tablet, four menu items will be visible by default: the logo, the two call-to-action buttons (“Log In” and “Sign Up”), and the toggle. To make everything pretty, our CSS will:
change the order of the menu items to adapt the layout to tablet viewports,
realign the items (see the explanation below),
make the Log In and Sign Up buttons look like real buttons (in the mobile layout, they look like links, as they are part of the toggleable dropdown list).
In the tablet layout, menu items are aligned in a different way. If you take a look at the four visible menu items, you will see that the two buttons are displayed in the center, while the logo and toggle are pushed to the left and right end of the container:
We can achieve this effect using the flex: 1; CSS rule. The flex property is a shorthand for flex-grow, flex-shrink, and flex-basis. It can exist with many different value combinations. When it’s declared with only one value, it belongs to flex-grow, with flex-shrink and flex-basis keeping their default values.
In the CSS above, we have added the flex: 1; rule to the .logo and .toggle elements. In this way, we can tell the browser that if there’s any positive space on the screen, we want to share it between these two elements. As the Log In and Sign Up buttons retain their default 0 value for flex-grow, they won’t get anything from the extra space. So, they will stay in the center of the container, as they adhere to the justify-content: center; rule set on the flex container.
8. Create the Desktop Menu
The desktop menu hides the toggle, sets back the original order and natural width of each item, and repositions the submenu.
It’s important to keep in mind that the tablet-specific rules also apply to the desktop menu. This is because here, the viewport width is larger than both 700px and 960px, so both media queries take effect. So, .logo retains its flex: 1; property and pushes the rest of the items to the end of the container.
9. Let Users Close the Submenu By Clicking Anywhere on the Page
Now there’s only one step back. As the dropdown menu is activated on the click event, it doesn’t close automatically when the user hovers away from the top menu item. This is especially annoying on desktop where the dropdown can cover the content.
So, it would be nice to enable users to close the submenu by clicking anywhere on the screen. We can add the feature with JavaScript:
/* Close Submenu From Anywhere */
function closeSubmenu(e) {
  let isClickInside = menu.contains(e.target);

  if (!isClickInside && menu.querySelector(".submenu-active")) {
    menu.querySelector(".submenu-active").classList.remove("submenu-active");
  }
}

/* Event listener */
document.addEventListener("click", closeSubmenu, false);
The custom closeSubmenu() function checks if the user clicked inside the menu with the help of the target property. If not and there’s an active submenu on the screen, the .submenu-active class will be removed, so the submenu closes itself. We add the event listener to the document object, as we want to listen for clicks on the whole page.
You’ve Built a Responsive Navigation Bar With Flexbox and JavaScript!
Our mobile-first, responsive navigation bar is up and running in three different layouts.
Here’s a reminder of the end result:
Flexbox is a great tool to implement complex layouts without any tweaks. If you combine flexbox’s alignment, ordering, and sizing properties with media queries, you can create different layouts for different viewports without having to manipulate the HTML source code.
For a list of best practices you should consider when building responsive navigation, check out this guide:
In this guide, we’ll have a look at some best practices you can follow and a couple of code examples you can use when building a responsive dropdown menu.
And if you are interested in how you can use flexbox in your everyday work, have a look at these other practical tutorials–each one helps you learn by building things you can actually use:
Do you want to wipe the slate clean and start your WordPress website from scratch?
Maybe your site has seriously lost its way, and you’d prefer to delete all of your content rather than manually unpicking every single one of your mistakes. Perhaps you want to cut ties with your old site and relaunch it as something entirely new. Or, maybe you were using your account to experiment with various WordPress themes and plugins, and now you’re finally ready to get serious about building your website.
Why go to the effort of deleting WordPress and then reinstalling it from scratch, when you can just hit the reset button?
In this article, I’ll share two ways that you can roll back time and restore WordPress to its fresh-out-of-the-box state, without having to go to the trouble of deleting and reinstalling WordPress.
When you reset your WordPress website, you restore all of its files and databases to their original state.
There’s countless reasons why you might want to reset WordPress, but some common ones include:
You’re repurposing your website. Are you craving a fresh start? Maybe you want to take your website in a radical new direction, or perhaps you have an old, abandoned website that you want to repurpose for an exciting new project. Whatever your reasons, restoring WordPress to its default settings is often easier than deleting all of your old content and settings manually.
You need to debug your themes and plugins. WordPress is generally a reliable, stable and secure platform, but no software is perfect. There's a chance you may encounter issues, particularly when using third party themes and plugins. If you’ve installed a large number of themes and plugins then you may struggle to identify which piece of software is causing you so many problems. To help you pinpoint the culprit, you may want to restore WordPress to its default settings and then reapply each of your themes and plugins individually, making sure to test your website after each change.
You’re cleaning up a test installation. Perhaps you’ve been experimenting with various themes, plugins and settings before starting work on your “real” website. If you’ve been treating WordPress as a testing ground, then your website may not currently be in a usable state! Rather than manually removing all of your experimental edits, simply hit the reset button and your account will be as good as new.
Do You Really Need to Reset WordPress?
Restoring WordPress to its default settings is a big step that should never be taken lightly.
Before factory resetting your site, you should consider whether there’s a less drastic solution that can deliver the results you want, without requiring you to delete all of your website’s content.
1. You Want to Move Your Website to a New Domain
When you created your WordPress account, you were asked to choose a domain name.
If you’re still using your original domain, then there’s a chance it may no longer accurately reflect your website. It’s also possible that your site has grown into something much bigger than originally anticipated, and you’re starting to worry that your light-hearted, jokey domain name is preventing people from taking you seriously.
While you could migrate all of your content to a new website and then reset your original site, this is a complex, multi-step process that will damage your website’s Search Engine Optimization (SEO) and performance.
Instead of migrating your content, you should register a new domain, then replace all instances of your old domain with the new domain name. Then, you just need to setup a few 301 redirects, and visitors will be automatically redirected to your shiny new domain.
Not only is this process far easier than a full-blown migration and WordPress reset, it also helps preserve your website’s SEO, ensuring that your site continues to rank high in Google’s all-important search results.
2. You Want to Delete All of Your Website’s Content
Sometimes, you may want to delete all of your website’s pages and posts, for example if you’re relaunching your blog. While resetting your WordPress will get rid of this content, it’ll also delete any other customizations you’ve made to your website, including any changes you’ve made to your WordPress settings.
Instead of resetting WordPress, you can delete all of your pages and/or posts, with just a few clicks:
In WordPress’ left-hand menu, select Posts > All Posts or“Pages > All Pages, depending on the content you want to remove.
Select the checkbox next to the Title list (circled in the following screenshot). All of your pages or posts should now be selected.
Open the Bulk Actions dropdown, and select Move to Trash.
Even if you want to completely overhaul every part of your website, you don’t necessarily have to delete everything and start from scratch! Often, you can completely change your website's look and feel by simply switching to a new theme.
If you want to test out various themes without giving your visitors whiplash, then the free Theme Switcha plugin lets you experiment with themes while displaying your current theme to anyone who's viewing your website.
Don’t Lose Your Content Forever!
So, you’ve considered the alternatives and decided to go ahead and reset your WordPress website, but before hitting that reset button it’s recommended that you create a backup.
Resetting your website may seem like the perfect solution now, but there’s always a chance you may need some of your old content further down the line. If you reset your website without creating a backup, then all of this content will be lost forever.
You can quickly and easily download a copy of all your posts, pages, comments, categories, and tags, using WordPress’ built-in Export tool. The Export tool generates an XML file that contains all of this content, plus references to your website’s image files. These references will only be functional if they link to an image that’s publicly available online, for example an image that’s hosted on another website. As a general rule you should expect to lose all of your images when you reset your website, so now’s the time to download any images that you want to hang onto.
Before exporting your content, it’s a good idea to spring-clean your website as this will help ensure a smooth, error-free import, if you ever need to restore your previous content. In particular, it’s recommended that you delete any comments that are marked as spam, and approve any pending comments, in order to ensure the exported XML file is as clean as possible.
When you’re ready to export your content:
Log into your WordPress account, if you haven’t already.
Navigate to Tools > Export.
To export all of your posts, pages, comments, categories, tags and references, select All content. Alternatively, you can specify which content you want to export.
Select Download Export File.
All of your content will now be downloaded as an XML file.
If you want to restore this content at any point, then you just need to import the XML file into your WordPress website:
In WordPress’ left-hand menu, select Tools > Import.
Scroll to the WordPress section and click Run Importer.
Select Choose file followed by the XML file that you want to import.
Click Upload file and import.
When prompted, assign this content to an author. You can either create a new author, or assign the content to an existing author, but it’s recommended that you choose an active author, just in case you ever need to edit this content.
Click Submit.
WordPress will now reinstate all of your old content.
Reset Your Website Using This Free WordPress Plugin
The easiest way to reset your WordPress website is to use a plugin.
There are plenty of free plugins that provide reset functionality, but in this tutorial I’ll be using the Advanced WordPress Reset plugin, which restores your WordPress database to its original state, deleting all of your content and customizations in the process.
Advanced WordPress Reset will not delete any of your themes or plugins, but it will deactivate them, so you’ll still get that fresh-out-of-the-box experience. At the time of writing, Advanced WordPress Reset does not support Multisite.
Although installing a plugin simply to reset your WordPress website may seem like overkill, resetting WordPress manually is a multi-step process, so this plugin can save you a tonne of time—and potentially spare you a few headaches!
To reset your website using the Advanced WordPress Reset plugin:
Log into your WordPress website.
Navigate to Plugins > Add New.
Search for Advanced WordPress Reset and when the plugin appears, select Install Now > Activate.
In WordPress’ left-hand menu, select Tools > Advanced WP Reset.
Read the onscreen warning. This plugin will reset your entire website—if you haven’t exported your website then this is your last chance to back out before losing this content forever. If you still want to proceed, then type reset into the text field.
To delete all of your website’s content and customizations, click Reset database.
Once the reset is complete, you’ll be prompted to log into your admin account, and your WordPress website will be ready to go!
How to Reset WordPress Without a Plugin
Most of the time, it makes sense to reset your website using a plugin—it’s quicker, easier and there’s less chance of things going horribly wrong! However, even if you do use a plugin, it can still be helpful to understand what that plugin is doing behind-the-scenes, just in case you encounter any issues when resetting your website.
The process of resetting WordPress manually will vary depending on your hosting provider, how your website is configured, and the tools you use to manage your site, but as a general rule you’ll need a File Transfer Protocol (FTP) client, and a hosting admin tool such as phpMyAdmin or cPanel.
In this final section, I’ll outline the steps you’ll typically take, in order to reset your website manually.
Delete Your MySQL Database
First, you’ll need to delete your website’s MySQL database, which will permanently remove all of your site’s settings and content.
You can delete this database using your hosting admin tool, for example if you’re using cPanel then you’ll find all of your databases by navigating to Databases > MySQL Databases. Once you’ve identified your WordPress database, make a note of its name and then go ahead and hit Delete.
Create a New Database
Your WordPress website cannot load without a database, so once you’ve deleted your old database, you’ll need to create a new one.
If you’re using cPanel, then:
Select the MySQL Database Wizard icon, followed by Create a New Database.
Give this database the same name as the database you just deleted.
Select Create Database. This page should now refresh automatically.
In Add a User to a Database, open the User dropdown and select your username.
Open Database and select the database you just created.
If your username doesn’t appear in the User dropdown, then you can recreate your account in the Add a New User section. Wherever possible, you should re-use your previous database username and password.
If you cannot remember your login details, then you can retrieve your username and password using your favourite FTP client:
In the FTP application, navigate to your website’s public_html folder, which contains all of your website’s root files.
Control-click the wp-config.php file and then select View.
In the file’s MySQL Settings section, locate your username and password.
You can now use this information to create a new database user.
Spring Clean Your Site: Deleting Themes and Plugins
While we have our FTP client open, this is the perfect opportunity to delete any plugins or themes that you no longer use:
Switch over to your FTP client.
Navigate to public_httml > wp-content.
The wp-content folder should contain plugins and themes folders. You can open each of these folders and delete the items that you want to remove, or you can remove all plugins by deleting the plugins folder itself.
Run the WordPress Installation Script
At this point, your WordPress website is completely clean, but it isn’t quite ready to use.
To turn this blank slate into a functional website, you’ll need to run the WordPress installation script:
Type your website’s URL into the address bar, but don’t press the Enter key just yet.
Add the following to your URL: /wp-admin/install.php
Now you can press the Enter key.
On the subsequent screen, give your website a title and create a username.
When you’re happy with the information you’ve entered, click Install WordPress.
The installation script will now run, and your WordPress website will be ready for you to use!
Conclusion
In this article, I showed you how to turn back the clock and restore your WordPress website to its original state, using either a plugin or by deleting your WordPress database manually.
Now you’ve got a fresh copy of WordPress, you’re ready to start building your website! For advice on how to create an attention-grabbing, high-performing website that visitors will love, check out some of our other WordPress tutorials.
The Best WordPress Themes and Plugins on Envato Market
If you’re a web designer who’s yet to step into the world of JavaScript, or you’re just starting in front end development, this tutorial is the perfect way to begin. It will explain a couple of really useful concepts, very easily, which you’ll be able to use right away and will get you out of the JavaScript starting blocks.
What Are Event Listeners?
Event listeners are among the most frequently used JavaScript structures in web design. They allow us to add interactive functionality to HTML elements by “listening” to different events that take place on the page, such as when the user clicks a button, presses a key, or when an element loads.
When an event happens, we can execute something.
The most common events you might “listen out for” are load, click, touchstart, mouseover, keydown. You can check out all the DOM events in MDN's Event Reference guide.
By following this guide you’ll learn how to create a JavaScript event listener in three different ways:
HTML’s global onevent attributes
jQuery’s event method
The DOM API’s addEventListener() method
Finally, we’ll have look at how to create a basic reveal-hide functionality using a click event listener.
1. How to Use Global Onevent Attributes in HTML
If you only want to add a one-liner script to a particular HTML element, you can use HTML's global onevent attributes defined by the HTML specification, such as onclick, onload, and onmouseover.
These attributes can be directly added to any HTML element that’s present on the page, however, their browser support widely varies. For instance, onclick is supported by all modern browsers up from IE9, while support for other onevent attributes such as ondrag is more patchy. You can check out browser support for global onevent attributes by typing “globaleventhandlers” into the search box on CanIUse.
The syntax of onevent attributes is simple and, as they are global attributes, you can use them on any element, for instance:
<button onclick="alert('Hi');">Click me</button>
Here, the onclick event listener listens to the click event on one specific button. When the event fires (the user clicks this button), the alert() callback function is executed.
If we want to add the same alert functionality to each button on the page, we should add the click event listener in a separate script rather than using the onclick attribute.
2. How to Create an Event Listener in jQuery
jQuery has several event methods that listen to different kinds of events, such as .click(), .hover(), .mouseover(), .ready(), .load(), and others. For instance, this is how the above event listener will look in jQuery:
This event listener adds the 'Hi jQuery' alert message to all <button> elements on the page. To target just one specific button, we should add a unique id to it and target that id with the click() event method, for instance:
As jQuery's event methods target the same UI events as HTML’s global onevent attributes, there are many overlaps between the two. However, as jQuery is also a library that runs on the top of native JavaScript, it has some event methods, such as .hover(), that are not included in the DOM API, so we can’t listen to them with either onevent attributes or the native addEventListener() method.
The .on() Method
jQuery’s event listeners have another advantage over the two other techniques: the .on() method. It allows us to attach more than one event to the same callback function. For instance, we can add the same alert functionality to both the click and mouseover events at the same time:
Using native JavaScript, we can listen to all the events defined in MDN’s Event Reference, including touch events. As this doesn’t require the use of a third-party library, it’s the most performance-friendly solution to add interactive functionality to HTML elements.
This is how our alert button example will look using plain JavaScript and the addEventListener() method:
/* Selecting DOM element */
const button = document.querySelector("button");

/* Callback function */
function alertButton() {
    alert('Hi native JavaScript');
}

/* Event listener */
button.addEventListener("click", alertButton, false);
Here it is in action:
In native JavaScript, we need to first select the DOM element that we want to add the event listener to. The querySelector() method selects the first element that matches a specified selector. So in our example, it selects the first <button> element on the page.
The custom alertButton() function is the callback function that will be called when the user clicks the button.
Finally, we add the event listener. We always have to attach the addEventListener() method to a pre-selected DOM element using the dot notation. In the parameters, first we define the event we want to listen to ("click"), then the name of the callback function (alertButton), finally the value of the useCapture parameter (we use the default false value, as we don’t want to capture the event—here’s a simple explanation about how to use useCapture).
How to Add Functionality to All Buttons
So, the code above adds the alert function to the first button on the page. But, how would we add the same functionality to all buttons? To do so, we need to use the querySelectorAll() method, loop through the elements, and add an event listener to each button:
/* Selecting DOM nodelist */
const buttons = document.querySelectorAll("button");

/* Callback function */
function alertButton() {
    alert('Hi native JavaScript');
}

/* Event listeners */
for (let button of buttons) {
      button.addEventListener("click", alertButton, false);
}
As querySelectorAll() returns a NodeList instead of a single element, we need to loop through the nodes to add a click event listener to each button. For instance, if we have three buttons on the page, the code above will create three click event listeners.
Note that you can only listen to one event with addEventListener(). So if you want the custom alertButton() function to fire on another event type such as mouseover, you’ll need to create a second event listener rule:
/* Event listeners */
for (let button of buttons) {
      button.addEventListener("click", alertButton, false);
      button.addEventListener("mouseover", alertButton, false);
}
4. How to Combine Event Listeners with CSS and Conditionals
Probably the best thing about event listeners is that we can combine them with CSS and if-else conditional statements. In this way, we can target the different states of the same element with CSS and/or JavaScript.
For instance, here’s a very simple example; a reveal-hide functionality. The HTML only consists of a button and a section. We will bind the section to the button using a JavaScript event listener. The button will be responsible for revealing and hiding the section below it:
<button class="reveal-button">Click me</button><section class="hidden-section">Lorem ipsum dolor sit amet...</section>
In the JavaScript, we first create two constants (revealButton and hiddenSection) for the two HTML elements using the querySelector() method.
Then, in the revealSection() callback function, we check if the hidden section has the reveal class or not using the classList property defined in the DOM API. If the hidden section has this class, we remove it using the DOM API’s remove() method, and if it doesn’t, we add it using the DOM API's add() method. Finally, we create an event listener for the click event.
/* Selecting DOM elements */
const revealButton = document.querySelector(".reveal-button");
const hiddenSection = document.querySelector(".hidden-section");

/* Callback function */
function revealSection() {
    if (hiddenSection.classList.contains("reveal")) {
        hiddenSection.classList.remove("reveal");
    } else {
        hiddenSection.classList.add("reveal");
    }
}

/* Event listener */
revealButton.addEventListener("click", revealSection, false);
Now, the JavaScript adds or removes the .reveal class depending on the current state of the hidden section. However, we still have to visually hide or reveal the element using CSS:
And, that’s all! When the user first clicks the button, the hidden section is revealed, and when they click it the second time, it gets hidden again. You can test the functionality in the Codepen demo below:
This basic reveal-hide functionality can be used for many different things, for instance, for toggling a menu on small screens, creating tabbed sections, displaying error messages, and more.
You Now Understand JavaScript Event Listeners!
In this guide, we looked at events that are initiated by users (click and mouseover), and how you can create event listeners for them.
Finding the right type of event requires solid testing, as there are events that are similar to each other but not quite the same, such as keydown and keypress. Plus, if there is more than one event listener on a page, they can interact with each other as well.
Note that you should always test how your event listeners work on different devices (this is especially important for touch events). Finally, each event listener should be attached to the element where it makes the most sense, as ideally, there shouldn’t be any unnecessary event listeners in your code.
Do you need a way to book appointments on your website? Do you need a way to show your business's upcoming events? Use high-quality WordPress calendar plugins and widgets for events, bookings, and appointments. I'll show you 25 of the best premium and free WordPress calendar plugins.
By adding a premium WordPress calendar plugin or WordPress schedule plugin to your website, you can provide your customers and potential customers with important information about your business and even collect payments for bookings.
The Best Calendar Plugins and Widgets on CodeCanyon
Explore over 7,000 of the best WordPress plugins ever created on CodeCanyon. With a low-cost one time payment, you can purchase these high-quality WordPress plugins and improve your website experience for you and your visitors.
Here are a few of the weekly best-selling and up-and-coming calendar WordPress plugins and widgets available on CodeCanyon for 2020.
These versatile WordPress calendar plugins and widgets allow you complete flexibility over the calendars and functionality of the calendars that you show your audience. Here a few of the notable features of the calendar widgets and schedule plugins listed here:
create custom events, classes, bookings, and meetings
appearance editor
filterable, sortable, and searchable booking list
Google Calendar integrations
WooCommerce integration
several online payment gateways
sharing on social media
If you need to implement any type of calendar, booking, or scheduling into your WordPress website, then head on over to CodeCanyon and choose from the premium plugins available.
Top 20 WordPress Calendar Plugins and Widgets (From CodeCanyon for 2020)
Here are 20 of the best-selling WordPress calendar and schedule plugins that are available for you to download on CodeCanyon:
EventOn is a multipurpose WordPress event calendar plugin that gives you all the things you need in a calendar. Not only can you customize each event with images, maps, icons, colors, and more, but you can also configure your calendar to search and sort in several different ways.
It has a clean, minimal design, and you'll be up and running quickly and easily.
EventOn is a nice, easy-to-use event calendar plugin that also offers a unique slider addon.
Bookly is an incredible appointment booking system that blurs the line between a WordPress website and a web application. It is well designed, fully responsive, and even supports gestures. It also has free integration with Zoom
It allows customers to book and cancel appointments, update personal information, and send payments.
Bookly's customization options and useful features make it more than just a way to serve customers well—it also helps the website owner keep track of staff and appointments at the same time.
You can create schedules for each staff member—you can even block out holidays.
Team Booking is a fresh take on appointment booking calendars and leverages Google Calendar to the fullest. For customers, it has useful features like displaying reservations and the option to cancel their appointments.
For admin, the following features come in very handy: ability to add discount coupons, keep and export your data, appointment approval system, customized forms for each booking type and maps.
Eventer is your all-in-one events management WordPress plugin with all essential and premium features.
Eventer plugin allow your website visitors to register for events online. Multiple ticket types can be made for any event: free or paid. Payments can be done via your choice of offline payment mode or online via PayPal.
Recurring events for multiple dates have their own count of available tickets and gets updated per user-registrations-on-date basis.
Use eventer’s shortcode generator to show your events in multiple styles. Everything fully responsive for all devices.
It is compatible with WooCommerce and WP Bakery Page Builder.
Calendarize it! supports WPBakery Page Builder, but it can also be used with any other popular page and layout builder by using shortcodes.
In addition to it's simple design, it comes with a powerful CSS editor that allows you to change colors, fonts and style to match your brand theme.
This WordPress calendar plugin supports single events, recurring events, arbitrary recurring events, and recurring events with exceptions. It also has advanced filtering with custom categories.
Booked is another great appointment booking option. It features an advanced appointment calendar which allows ease of management of appointments. It also gives you endless color possibilities when it comes to the design.
Besides guest booking and customer profiles, it has customizable customer and admin emails. Other additional features include: custom login and registration pages, time slots, and custom fields.
Calendarista promises you will fall back in love with booking!
It's fast and easy for businesses to add this Wordpress booking and calendar plugin to their websites. They will quickly and easily be able to take online bookings. This versatile system works for all kinds of businesses: hotel, car rental, apartment rental, travel agency, beauty salons, restaurants and more.
The plugin offers 10 booking modes out of the box, 3 payment gateways, custom form builder, backend calendar to view your appointments, google maps and supports Woocommerce..
Events Schedule is a simple yet powerful WordPress events calendar that lets you schedule classes and events in seconds. It is the perfect plugin for any event organizer.
When it comes to search and filter, Events Schedule offers five filter categories: namely type, location, instructor, day, and time of the day.
This fully responsive WordPress event calendar can integrate with Google Maps and WooCommerce. It also includes a countdown feature.
Timetable Responsive Schedule for WordPress offers a new approach to WordPress calendar plugins. It includes plenty of event options, many shortcode options and great widget lineup making it one of the best WordPress calendar plugins you'll find.
With it, you can create a timetable of events easily! Use the Timetable shortcode generator to create timetable views for classes, medical departments, nightclubs, tutoring, and so on.
Quickly create a timetable by:
adding a new event with day, time, category, and more
adjusting and configuring the design and appearance
generating your shortcode and placing it into a post or page
WordPress Pro Event Calendar stands out from the pack. What really sets it apart is the ability to import events from ICS feeds and Facebook. Best of all, WordPress Pro Event Calendar accepts events submitted by front-end users, making it easy for users to add events.
Other great features of this well designed and fully responsive include: WPML support, fully responsive layouts, flexible event settings, ability to subscribe to a calendar.
Event Booking Pro is an impressive WordPress calendar plugin that boasts over 600 settings! This WordPress calendar plugin is always adding more great features.
There's no shortage of shortcodes. It supports CSV. Everything can be customized and styled as you like, making it fit into your WordPress theme design perfectly.
It also comes equipped with user-friendly event creation, unlimited events, offline and multiple booking, and the ability to create coupons. Finally it integrates with PayPal.
It is a great option for setting up a fully functional event booking system.
The HBook hotel booking system is specifically built for hotels and B&Bs. It has a clean design that makes it very easy for customers to able to book directly from your website.
The WordPress hotel booking plugin features powerful booking management that lets you view bookings and reservations. You can also synchronize your bookings with Airbnb. This snappy plugin includes: seasons and rates tables, availability calendars, customizable booking forms.
It also comes with multiple payment gateways such as PayPal, Stripe, Square, and Mollie.
WordPress Events Calendar Registration & Booking plugin is feature-rich and has everything you need (and maybe more) to successfully set up a fully functional registration and booking system. It offer many options you'll only find in plugin addons.
This "out of the box" solution includes: countdown timer for all your events, stats dashboard that lets you keep track of payments, attendees, view the latest events and event categories.
This WordPress event calendar plugin offers everything you need to get started in creating events. It has a built-in booking system where users can book and pay for tickets and appointments.
You can easily create single, multiple, and all-day events, or events that last for more than one day. You can showcase events in different ways including a grid, box, map, agenda, and more.
It also comes with a front-end submission form where users can submit events. Users can also share events via Facebook Messenger, WhatsApp, and Viber.
Amelia is a simple and powerful plugin for accepting online appointments and bookings. It is fully customizable and has a smooth UX that provides a seemless booking experience in just one page.
It features a good range of elements and components that make it easy to create beautiful layouts, even when you have no coding experience.
Amelia also allows for Google Calendar synchronization. It is the perfect plugin for gyms, spas, law consultants, fitness experts, etc.
On top of multiple payment options, other key features include: powerful admin dashboard, real-time SMS notifications
The Responsive Event Scheduler plugin is one of the best options for publishing event schedules on your website. It is suitable for music festivals, conferences, conventions, meetings, training, exhibitions, etc. It is fully responsive, WPML ready, has SVG icons and one-click color customization.
Responsive Event Scheduler is not only impressive from a feature standpoint, but it's one of the best-looking options you're going to find.
If you're already using Gravity Forms and need to integrate appointment booking, this date and time picker plugin is certainly worth a look. It comes with many options for service intervals and slots.
It supports paid and non-paid booking and accepts any payment gateway.
Combined with Gravity Forms, gAppointments is a powerful plugin for booking appointments.
As the name suggests, Chauffeur Booking System is a car reservation system suitable for companies of all sizes. It provides an easy way to book a vehicle based on distance, hourly rate, or a flat rate. It also supports WooCommerce and Google Calendar integration.
Webba Booking is specially designed and optimized for service providers, making it possible for them to save time and money. It provides a real-time, two-way Google Calendar synchronization. It also allows you to set different time zones, hence catering to customers all over the world.
It supports unlimited appointment schedules, and unlimited staff appointments and staff members.
Finally, users can perform multiple bookings simultaneaously, pay with Stripe and Paypal.
Responsive Timetable for WordPress is a flexible calendar plugin that can adapt to different types of businesses. This plugin has a built-in live editor, offers the ability to create and showcase events with a clean and responsive interface. You can also create advanced filters for easy event filtering. It also comes with a custom CSS and color picker.
5 Free WordPress Calendar Plugins and Widgets for Download in 2020
While the premium plugins and widgets listed above have the most features, buying a premium plugin or widget may not be in your budget. That's why I've compiled a list of the top five free calendar plugins and widgets for 2020:
With this free plugin, you can create and manage events with ease. The features available on this plugin allow you to completely customize your calendar to fit your business's needs.
Simple Calendar is the easiest way to add Google Calendar events to your WordPress site. The Wordpress calendar plugin has a ton of great features including design templates, time zone settings, fully responsive calendars, and much more.
The All-in-One Event Calendar offers a clean visual design with a comprehensive set of features to create an advanced website calendar system. Give this free plugin a try! You won't be disappointed.
Sugar Calendar is a simple and lightweight calendar that provides you with all the necessary features for event management. The easy-to-use interface and the minimal set of features in this plugin will help you get your event calendar up and running in no time.
Whether you are running a real estate business, yoga class, or personal training, the Booking Calendar plugin can help you implement a great booking system. Add this plugin to your collection today!
How to Create a Calendar for a Yoga Class With WordPress Pro Event Calendar
Now that I have gone over all of the best free and premium plugins available on CodeCanyon, I will show you just how easy it is to create a calendar with one of the premium plugins. We are going to go over how to create a simple calendar that displays the times of our yoga class on a calendar with the Wordpress Pro Event Calendar plugin.
1. Create a Calendar
Once you have installed the Pro Event Calendar plugin, we will head on over to WP Dashboard > Event Calendar > Calendars so we can create the calendar that we want to be displayed on our yoga studio website. Next, click the Add new calendar button to create a new calendar. We will fill in the Title field to say Yoga Calendar. Next, click the save button at the bottom of the calendar editor.
2. Create an Event
Now that we have created our calendar, it is time to add our event. Navigate to WP Dashboard > Event Calendar > All Events. Click the Add New button to create a new event. We will title this event Yoga Class.
In the right-hand column, we will set up the details for this event. Our yoga class is every Monday, Wednesday, and Friday at 2 p.m., so we need to reflect this in the event. Under Start Time, we will type in 2 p.m. Under Frequency, select Weekly. Then select the checkboxes next to Monday, Wednesday, and Friday.
Finally, hit the Publish button, and the event will now be present on the yoga calendar.
3. Add the Calendar to Your Website
Now it is time to add the calendar to the website. WordPress uses shortcodes to add the calendar to your website, so we will go back to WP Dashboard > Event Calendar > Calendars and copy the shortcode that is under Default Shortcode. We will then click WP Dashboard > Pages > Add New and title it Calendar.
In the text editor, we will paste this shortcode. Hit the Publish button, and that's it. We have successfully created our yoga calendar, and it's now displayed on a new page that we created.
This short tutorial only scratched the surface of what this plugin can do. I also have a more in-depth tutorial on this powerful plugin, so be sure to check it out!
Unlock the Power of CodeCanyon's WordPress Calendar Plugins & Widgets
To create a fully functional calendar and booking system on your WordPress website, download one of the many premium calendar plugins and widgets from CodeCanyon.
The feature-rich plugins on CodeCanyon will help ensure that the booking process is quick and easy, not only for your customers but also for you in the WordPress dashboard.
What are you waiting for? Get a WordPress calendar or booking plugin on your WordPress website today!
Running a school is complicated; whether it be a kindergarten, a university, or somewhere in between (not to mention online courses, MOOCs, and speciality schools!). WordPress is ideal for school sites because it’s customizable and adaptable. Maybe you run events, in which case you’ll need an event calendar. Have smart students on your campus? You should include a blog for student writing and perspectives. Selling your own webinars online? You’ll need a way to process those payments.
WordPress can do all of that, and starting with a WordPress theme custom-built for education and school sites is a simple shortcut (don’t worry, it’s not cheating!).
Best WordPress Themes for Making a School Website
Themeforest is the only place to look for education WordPress themes and has hundreds of great Premium WordPress themes to provide a starting point for your school website.
Education WordPress themes available on Themeforest
In this post we’re going to list our favorite education WordPress themes–categories include: schools for kids (kindergartens), university websites, speciality/niche school sites, and online learning.
Our editorial team keeps this post regularly updated, with older and obsolete themes being removed, and the newest and most popular WordPress themes added.
This theme is a top-seller with a strong rating. It comes with all the best plugins, including Visual Composer, Revolution Slider, WooCommerce, and WPML Multilingual. You can also hire the makers to install it for you through Envato Studio. Either way, this is a great choice for any kindergarten school website template.
The demo site for this WordPress theme is an elementary school, but with its class timetables and eCommerce support, it could also work for more complex sites.
Smarty has demo sites for kindergarten, schools, and universities. It comes with four predefined color skins, so you know you’ll end up with a color scheme that’s designer-approved.
A pixel-perfect theme that comes with a simple video installation tutorial and premium plugins. Like all of the themes on this list, it’s mobile-friendly and responsive.
Fable is made for kids. It’s bright and fun, with more than 47 ready to use page templates. You can import pre-made demo content easily with a single click, using the Theme demo data installer and benefit from a fully-functional site in a matter of minutes.
High School and University Website WordPress Themes
Built with Bootstrap, this university-level website has teacher profiles, online shops, quizzes, events, and more. The photo gallery on the home page is a great way to showcase the personality of your school.
With two demo layouts and a drag-and-drop page builder, this WordPress theme is super easy to customize. Add Google Maps, contact forms, and Font Awesome typography.
This makes for a great primary school Wordpress Theme. One of the best!
This is one of my favorites on the list; a simple, stylish theme that rivals the design of a tech or business website. There’s a list of websites using this theme on the product page, so you can check out real-life examples for inspiration.
The best Wordpress Theme for a school website. Astounding!
A website built for a schools or kindergartens for children with special needs. It’s compatible with ThemeREX Donations plugin and has a powerful, fully responsive framework.
Need to book private music lessons, offer group classes, and add audio to your site? If you’re making a music school website, check out this theme, Melody.
This WordPress theme is highly rated for its support team. It was a winner in the category of “Best Education & Learning Theme” for the Envato Most Wanted contest.
Language School – Courses & Learning Management System is a WordPress Theme that's a powerful tool to create a website for any school, courses, training or other learning and education website.
The theme features functionality that will satisfy any learning, teaching and other education needs, including Timetable integration
Online Learning Platform WordPress Themes
There are various Learning Management System (LMS) plugins available for WordPress. With them, in combination with a premium WordPress theme, you can build a comprehensive online learning website to host courses, tutorials, curriculums, and whole communities of eager students.
Currently shipping version 4.0 Eduma has been one of the most popular education WordPress themes on Themeforest for a long time. With over 20k downloads, and an almost perfect star rating, the numbers speak for themselves!
Eduma ties in with the author’s own LMS plugin “LearnPress”, allowing you to build your own online learning platform (in any educational niche you choose) with excellent support from the development team.
Okay, now we’re getting into the more complicated website types: learning management systems (LMS) and online courses. Skilled, a theme from elite WordPress designer Aislin, is one of the top sellers in this category–it’s a great starting point for any LMS website.
This course builder supports online webinars, comments, email notifications, sales on courses, subscriptions, and more. This is ideal if you’re a teacher or starting your own online school/classes.
Ideal for an online education WordPress theme with a clean and responsive look.
Guru works with it all: WordPress, WooCommerce, WPML, MailChimp, Sensei, and Event Calendar. There’s super-detailed documentation, course analytics, grading, and it’s SEO-friendly.
Designed by Themeum, Varsita is a top-seller for schools and online learning systems. It has PayPal payment integration, events management, five homepage variations, and Visual Composer. There’s also a dedicated support forum on their website.
WPLMS is an enterprise-grade learning management system for WordPress that's built on BuddyPress and WooCommerce it provides the best of Social and eCommerce sites.
From Fortune 500 companies to several thousands of successful educational startups around the world, WPLMS is the number one choice.
Whether you specialize in local workshops or online courses – MasterStudy is the only theme you need to build a vibrant and compelling learning hub.
Based on extensive research into the education and learning industry, it's been developed with a range of first-class features to make your life easier—saving you time and delivering excellent results.
Inspiring Education Websites in the Wild
Having walked through the best education WordPress themes available on Envato Market, let’s take a look at some standout examples of education websites to see how others do it:
edX.org is one of the largest online course providers in the world. Their homepage is simple and actionable, and highlights the credibility of their courses.
A top liberal arts university in the United States (and, okay, my alma Mater), William and Mary’s website is a recent redesign. It ties in their newest “For The Bold” marketing campaign, uses school colors as accents, and has consistent branding throughout the site.
Code Like a Girl runs coding workshops for young women. Their website is stylish, fast-loading, and user-friendly–all “must-haves” for any website, but especially important for a company that works in the web development space.
More WordPress School Themes
Here are a few more WordPress theme picks that we couldn’t fit on the list, plus some additional roundups which might suit your niche even more perfectly:
Being a friend to mother earth is not only the right thing to do,
it’s also a booming business sector. A number of companies and
organizations that identify as being
environmentally conscious have come online in recent years.
This green theme for businesses has led to a need for eco-friendly
WordPress themes. And that’s a good thing, because authenticity is
vital. It’s about more than adding a picture of a green field or blue
sky to your branding material. The look, feel and content of your website need to demonstrate a commitment to
clean, healthy practices throughout.
The good news is that there are a number of top-notch eco-friendly
WordPress themes on the market. Today, we’ll introduce you to some free
and commercial themes that are a perfect fit for your environmental
organization or organic web shop.
Find the Perfect Eco-Friendly WordPress Theme on ThemeForest
Looking for the perfect eco-friendly theme
for your WordPress website? ThemeForest, part of the Envato
marketplaces, has you covered. Browse their selection of high-quality
and highly-customizable themes catering to green businesses and
organizations today.
Download These Eco-Friendly WordPress Themes
This collection of free and premium WordPress themes offers great
solutions for green energy companies, organic food companies,
environmental charities and more. You’re sure to find one that fits your
specific needs.
With three pre-built demo sites, Eco Nature will provide your
environmentally-friendly project with a quick start. It offers a clean
design, featuring a beautiful color scheme (which can be fully
customized), along with tons of typography and header options. Also
included are mega menus, built-in animations and a selection of page
layouts to choose from.
Green earth is a great choice for non-profit organizations with a
focus on the environment. Features include a drag-and-drop page builder,
custom shortcodes and social media sharing to help your content
generate buzz. In addition, the theme can be easily customized via a
powerful settings panel.
Promote a healthy lifestyle with the Organic Farm WordPress theme.
It’s built specifically for nutritionists, cooking schools, health
coaches and farms.
Choose from an array of custom icons, page layouts,
menus, headers and typography options. WooCommerce support means you
can run an organic web shop with ease.
VW Eco Nature is a free WordPress theme that aims to serve everyone
from eco-conscious bloggers to nature-oriented businesses. It’s
fully-responsive, offers a number of page layouts and a custom slider. A
solid option for those on a tight budget.
Gaea offers design flexibility and a number of features geared
towards environmental charities and NGOs. Choose from 12 predefined
color schemes or create your own.
There’s also a special focus on
events, with a full-width calendar and event countdown timer included
in the package. It’s also built with the Bootstrap framework, offering a
stable foundation you can rely on.
Looking to raise funds for an environmental cause? Green Nature is a
green theme that comes with a built-in donation solution that works
with both PayPal and Stripe. In addition, there’s also a “Take Action”
form that can be used for petitions, pledges and more.
Green Nature - Environmental / Nonprofit WordPress
If your website revolves around organic food, Superfood is a top
eco-friendly WordPress theme for you. With 12 spot-on home page designs
to choose from, you’re sure to find a great fit for your business or
blog. The theme also comes loaded with lots of social media integration
to help you spread the word.
There aren’t a lot of eco-friendly website templates for those who
just need something basic. However, Organic Lite may be a good match.
This free WordPress theme offers a clean look without overwhelming you
with options.
Clean energy needs a clean WordPress theme – and Nur fits the bill.
Your project will be off to a fast start, thanks to 1-click demo
content importing and plenty of room for customization. The included
page builder plugin will help you make short work of even the most
complex page layouts.
Nur - Alternative & Renewable Energy WordPress Theme
Organic food and health products are a natural fit for an online
store. NaturaLife makes setting up your organic web shop easy, with lots
of demo sites and page templates to choose from. Plus, the theme is
built for use with WooCommerce, ensuring that your store will look and
function beautifully.
Greenova is designed for those who like to make things grow –
perfect for landscapers and gardeners alike. Included with this green
theme are 14 home pages and a wide variety of secondary page layouts.
It also features compatibility with the Gutenberg block editor and is
fully-responsive.
Farm Agrico will help you put healthy foods on the table with a
number of outstanding features. This Gutenberg-compatible theme offers
1-click import of demo content, multiple home page layouts and a number
of custom shortcodes. An Ajax search feature makes it easy for users to
find exactly what they’re looking for.
Farm Agrico | Agricultural Business & Organic Food WordPress Theme
Organizations seeking donations will want to consider Lifeline, a
WordPress theme aimed at charities and non-profits.
The built-in Ajax
donation system makes for a high-end user experience, while allowing you
to easily view donor reports. You’ll also find 13 home page demos,
including several with an environmentally-friendly look.
Lifeline - NGO, Fund Raising and Charity WordPress Theme
Bring the neighborhood farmer’s market online with GreenMart. With templates covering
several organic web shop niches, you can quickly build a website around
your farm-fresh goods. Support for multi-vendor shopping cart plugins
means that you can bring a number of sellers together in one virtual
marketplace.
Get your green business off the ground with GreenTech Lite. This
free WordPress theme provides a solid foundation for eco-friendly
ventures like green energy, recycling and tech companies.
Eco-friendly products will have a great home on the web with
GoSolar. It offers tons of room for customization, with five home page
layouts and lots of secondary page templates. Other goodies include
custom UI elements, mega menus and a “coming soon” page if your site is
under construction.
Lettuce is a WordPress theme aimed at those who sell healthy foods
and services. It’s WooCommerce compatible and includes a product
delivery date plugin to help you better serve customers. In addition,
there’s a recipe management feature that makes sharing tasty
concoctions a breeze.
Using the right colors can help you define an eco-friendly message.
Green is always a good bet, but other colors found in nature can also be
effective. Different shades of blues, yellows and browns can add the
perfect complement to your cause.
2. Utilize Natural Images
Along with the right color scheme, photographs are an essential
asset. Therefore, look for images that show natural beauty in all its
forms. They can help to demonstrate the importance of the environment
and the goodness of natural products. Don’t know where to start? Envato Elements offers a huge selection of nature photos.
Portrait of smiling environmental protection volunteers cleaning beach
3. Go Behind-The-Scenes
Whether you’re selling organic foods or working to protect a local
stream, it’s important to fill visitors in on the process. Show them why your product is different or how you’re making a difference. Blogging can be an optimal way to do this.
4. Encourage Action
When it comes to environmental causes, people naturally want to
pitch in. Your website can help by providing ways people can take
action. Features like online donations and social media sharing are
great places to start.
5. Get Personal
Visitors will want to know who is behind your business or
organization. Post profiles of team members to help forge a bond. This
builds loyalty and can increase your chances for success.
Going Green With WordPress
WordPress is the perfect tool to help your environmentally-focused
organization get online. With the massive number of available
eco-friendly website templates, you won’t have to settle. You have the
ability to choose a green theme that will help spread your message to
the world.
When it comes to eCommerce, the design of your site plays a crucial role. It can make or break your website—leading to sales either falling flat or converting profitably.
Even though you are probably eager to get your new site up and running as quickly as possible, it’s important to first make sure you pick the right eCommerce platform and best site theme to work with.
Shopify is a leading eCommerce website solution and we have a great selection of the best performing Shopify themes to work with. Whether you need a theme for your own online store, or to use for your next client website project, we have you covered.
Shopify eCommerce Theme Features
Aside from blending in with your brand, your online store should have a few important features that will make your website stand out and delight your visitors. When shopping for a Shopify eCommerce theme make sure they have the following features:
modern, clean and easily customizable
cross-browser compatibility, responsive design, and SEO-friendly
customer support, quality coding, and great reviews
built-in custom settings panel which will allow you to modify the template to your own liking
optional: support Shopify Sections (for easy drag and drop layouts)
With a quality Shopify theme in hand, you’re starting your online store with a great eCommerce design solution. All you need is to set it up, add your branding, custom product information, and start optimizing for online sales.
25 Best Shopify Themes From Envato Market
In this post, I’ll share with you a selection of the best Shopify templates we’ve got from our single purchase Envato market, all of which are sure to make your website stand out and help you drive eCommerce sales.
Best selling Shopify themes available on Envato Market
New Shopify themes for sale are added regularly, and outdated or discontinued themes are removed from the list. If you have any suggestions or recommendations please leave your thoughts in the comments!
Wokiee is one of the best Shopify themes you could find if versatility is what you’re looking for! Its latest update included 16 new skins and loads of blocks to help you build the eCommerce layout you want. Check out the sophisticated atmosphere created by its wallet skin:
Wokiee - Multipurpose Shopify Theme (wallet skin)
..and then compare that to the fun screaming out from its New York burger joint skin:
Wokiee - Multipurpose Shopify Theme (New York burger joint skin)
Hard to believe you’re looking at the same Shopify theme, right?! Take a look at the demo for even more skins, including one for Craft beer, a comic store, a coffee shop, a bike store, and many others! No doubt, this is one of the best performing Shopify themes.
Basel, recently updated to version 3.0, is a multipurpose Shopify theme, offering a classic-looking storefront for many types of ecommerce businesses including fashion, electronics, and (as you can see from the screenshot) food and drink.
Customization options allow you to customize the color scheme and use the Drag & Drop page builder, as well as upload your own logo if you choose. And Basel is compatible with the Nitro Apps range, including Product Bundle, Product Lookbook, Fontify, Stockify, Cartify, and Nitro Live Coupon.
Shella is all about performance, and whilst performance is impacted by what you, the user upload to alter on your online store, this Shopify theme gives you a great head start. It includes features such as advanced filters, a banner builder, and a MegaMenu builder and regularly sees new skins added when it’s updated. If you want the best Shopify templates, this is a great option.
Ella updates extremely regularly, allowing you to pass on the updates to your client (or just take advantage of them yourself). With monthly additions to the collection of skins, you’ll have try hard to stick with your original choice! The latest update included PETICA Store Demo, which you can see below.
Ella supports Shopify sections, which allow you to drag and drop blocks of content within your design. This is one of our nicest Shopify themes for sale.
Gecko is a responsive Shopify theme with a range of subtly different homepages and layouts. It’s clear and inviting, and takes advantage of all Shopify’s selling features.
Gecko comes with a powerful theme options panel, an array of shortcodes, product bundles, and even integration with Instagram. Recently updated, Gecko also gives you access to discounted use of Ryviu, the popular product reviews platform.
Under the moniker of Fastor v4 this multipurpose theme has seen plenty of updates since the original version. It’s now faster, with less complexity, and has seen support for Shopify features (like Shopify Sections) added too. Choose from a multitude of skins (82 in total!) including a huge number of recently added examples, such as the fashion demo seen below. The team behind Fastor have also released improved documentation with video walkthroughs and tutorials. All of this makes it one of the best performing Shopify themes.
Jasper uses six essential layouts, combined with full-width or boxed variants, along with all the options available through Shopify Sections, to build a varied selection of theme possibilities. Its product page options are particularly interesting, and it comes with a range of widgets like product quick view, mailing list popups, a currency switcher, and scrolling reveals to add some motion to the overall design.
Banita is a cool Shopify themes for sale. It’s a multiconcept Shopify theme which will serve all kinds of eCommerce projects well (check out the item page to see examples of online stores which use this template in the wild). Strong, and full of youthful zing, your shop will demand attention when it’s wearing one of Banita’s ten pre-built homepage layouts.
Boutique has attitude, cold hard style, and a touch of raw finesse. Although pitched as a fashion store, its clean lines could be turned to a wide array of store types. Check out the demo for a better idea of how it could suit your eCommerce project.
Pastel colors and sharp edges are the name of the game for iOne. Its twelve demos show off the clean aesthetic perfectly, giving you off-the-shelf solutions and providing inspiration for your own customizations. The theme boasts a number of unique built-in features such as an instant list/grid change, AJAX paging and toolbar, sticky menu, alternative images, lazy loading, product zoom, off-canvas menu, and plenty more.
Voted best Health & Beauty Shopify Theme by Envato Staff, Foodly appeals to customers looking for quality and clarity. Its homepage puts buyers in control–user experience having been forefront in the design process.
Clean and feature-packed, Foodly is a Shopify theme which shouts “dinner’s ready”. Some of its culinary-specific features include the recipe articles and its “Nutrition Value Section”. Bon appétit, baby.
Simolux is a modern highstreet fashion store, online. Whilst packed with useful features you’d expect from any Shopify store, along with warm, feminine visuals, Simolux’s popularity actually stems from the documentation and customer service provided by its maker, gredThemes. Don’t forget to check this and more nice Shopify themes for sale.
Material is a multi-purpose, responsive eCommerce theme suitable for any type of online store. It features a mega-menu, which is an advanced filter module that allows your customers to sort products according to size, color, or price.
This Shopify theme also includes multiple widgets, built-in customization options, a gorgeous lookbook, and many more features. It should be noted that Material also allows you to add video in the slider and includes social sharing features.
If you’re looking for a truly versatile theme, look no further than Everything. With 50 different designs, this theme is suitable for any type of eCommerce site—from a kid’s fashion store to a luxury watch store to a high-tech store.
It features a responsive design, advanced product filter, mega-menu, multiple slideshows with different effects, rich snippet support, customization options, and much more. With a feature set like that, Everything is a great starting point for any eCommerce website you’re planning to launch.
Hosoren is a clean, elegant eCommerce template specially designed for professional online shops. The theme features a beautiful image slider, two product styles and four portfolio styles, unlimited color options, as well as the option to showcase multimedia content to go along with it.
It is retina ready, fully responsive and mobile-optimized to ensure that your website will look stunning and work smoothly across all modern devices—give your users an amazing viewing experience while they shop.
With a minimalist design, Puro is a theme that will display your store in an elegant way across all devices and screen sizes. This theme is sure to give your store a luxurious and attractive feel.
The theme’s features include advanced filtering, mega-menus, slideshows, responsive quick view popup, wishlist pages, Google Maps, newsletter integration and much more.
Logancee is the perfect combination of a clean, modern design with plenty of features. The theme comes with fifteen unique homepage designs, unlimited header styles, unlimited color schemes, a responsive design, integration with Google Fonts, social media sharing buttons, product variants, and more. It is also SEO optimized, which is another benefit to consider when choosing an eCommerce theme.
AP Next Store is a theme packed with features. With the ability to install the demo content in one click, you can get your website up and running in a matter of minutes, before you dive into customization options. The theme is fully responsive and features six different layout options and shortcodes for adding buttons, YouTube, Facebook, product lists, sliders, and more to your pages.
It also comes with numerous customization options, wishlist pages, quick view popups, Google Maps integration, social media integration, and so much more. AP Next Store is definitely a theme that will satisfy anyone who wants plenty of control over the layout and design of their website.
Home Market is a great choice for any eCommerce website that has a large inventory. The theme’s main focus is to make it quick and easy to browse through all the categories and products your store has to offer.
Features include a responsive design, unlimited color options, flexible layouts, integration with Google Fonts and Font Awesome, a light-box login module, mega-menus, sidebar filtering, and more.
Everest is a multi-purpose responsive Shopify theme with eight different homepage layouts and SEO optimized code. The design is perfect for any site from a high-end jewelry stores to fashion and accessory stores. The theme offers plenty of customization options via the advanced admin panel and the built-in slider is designed to put your products in the spotlight.
On top of having features like mega-menus, quick view, zoom, newsletter popup, related products, and cross-sell sliders, Everest also comes with custom labels, best-sellers, and a parallax effect widget to add an extra custom touch to your website.
Well, I know I said 20, but here are a couple of bonus Shopify themes for you! Handy is a stylish, responsive, and easy to use Shopify theme. It’s a great choice if you are looking to start a shop selling handmade products.
The theme comes with plenty of features, like an out of the box layout configurator that allows you to set custom layouts, mega-menu, an EU privacy cookie, video slideshow, live search, wishlist, MailChimp integration, social networking, and more.
Thanks to the admin panel you can customize all the colors as well as change the fonts throughout the theme. Get your shop online with this beautiful Shopify theme.
Peacock is a multi-purpose, responsive Shopify theme suitable for any niche. The theme includes features such as SEO optimization, auto-complete suggestions search, recently viewed products history, advanced product filters, and a shipping rates calculator.
It also comes with a preloading screen, wishlist, FAQ, testimonials, and review pages, as well as MailChimp integration, slideshows, color variations, and more. Display your products online with this attractive Shopify theme.
With over a thousand sales to date, and a rating of almost 5 stars, the Belle Shopify theme by elite author adornthemes is worth taking a look. Its latest version (2.5) includes four new Christmas theme layouts, in time for the festive season.
This is one of the coolest Shopify themes for sale in ThemeForest. Lezada features more than 225 homepages, 40+ drag and drop sections, and 10+ headers so you can build your Shopify store about anything:
Accessories
Arts craft
Bikes
Cosmetics
Coffee
Games
Furniture
Hair care
Sports
Travel
And more!
If you’re looking for the best Shopify templates, Lezada is 100% responsive and is built with Bootstrap 4, CSS3, HTML 5 and W3C validated markup.
This is one of the best performing Shopify themes we’ve got. It’s a clean, modern and user-friendly Shopify theme built with customer experience in mind. This theme with includes Unique product filtering, Unique Compare, Multiple ajax off-canvas Wishlist & Cart Sidebar, Product Quick View (Off-canvas or Popup), and so much more useful features.
Choosing the right theme for your eCommerce website is only the first step on your journey. If you want to make the most of your online store, here are four tips to help you optimize your website and make sure your online store is off to a great start.
1. Use the Power of SEO
Within your site there are a number of improvements you can make that will increase your search engine visibility, making it easier for people to find you. Those improvements include adding a blog to your online store which answers your buyer’s potential questions, writing clear and informative product descriptions, adding alternative text to your product images, using short and descriptive URLs, and making sure your website loads quickly.
2. Include Strong Copy
Make sure you have a clear and compelling call to action on your homepage, and that your copy clearly states what your brand and store is about, as well as showcase product reviews and testimonials. And describe your eCommerce products so they sell.
Include your top categories in the main navigation and ensure that the search box is clearly visible. Be sure to add related products on single product pages
4. Reduce Shopping Cart Abandonment
There is nothing worse than a customer who backs out of a purchase right before check out. In order to reduce cart abandonment, make sure all your prices are clearly stated up-front, and consider offering free shipping over a certain cart value. Another great option is to offer a satisfaction guarantee and Shopify’s automatic cart recovery as well as adding a Live Chat option to your site.
Learn More About eCommerce and Shopify Templates
I hope you’ve liked our selection of the best performing Shopify themes and the tips I just shared with you. Now, if you’re still looking for more useful resources, check these out:
Extra: we’ve created this Shopify guide especially for web designers and developers. Check it out if it’s up your alley!
Before you leave, let me share with you more of the best Shopify templates from our marketplaces. Get some inspiration and start your Shopify website today!
Launch Your eCommerce Site With a Great Shopify Theme
Running an online store is an exciting business venture. However, it shouldn’t be taken lightly as a number of things can go wrong if you start off on the wrong foot.
Your site design is a crucial element to your eCommerce success and should be done right the first time. Take a look through our best eCommerce Shopify themes to start your online store with an effective design.
Adobe XD and Figma are fantastic design apps which, over the last couple of years, have become go-to design tools for many. UI kits are a great complementary help for designers and anyone needing to quickly put together a design for a website, a product, or even a mobile app. If you need a quality UI kit for your project, you’re in the right place.
What is a UI Kit?
A user interface (UI) kit, is a pre-made design library that is meant to be flexible, adaptable, and customizable. Think of UI kits as pre-made design templates. You can get a UI kit for any kind of design whether it be for a specific product concept such as a social media app or a portfolio site, or for any platform such as a website or a mobile app.
12+ Adobe XD UI kits
Let’s begin with a list of Adobe XD website UI kits that range in size, style, and demo content. Each and every one is a perfect example of a high-quality website UI kit.
First on our list of the best website UI kits for Adobe XD is Elbora, which comes with 11 different screen designs including a homepage, an ‘About’ page, a contact page, and a portfolio page design. It’s a fantastic website UI kit because of the quality of the visual design and style.
This UI kit comes with both desktop and mobile screen designs! Elbora is a wonderful option for a portfolio website or a small creative agency.
Elipso is a fantastic option because it features a well-designed, modern UI style. It features:
12 different layouts
1170px, 12-column Bootstrap grid
Font Awesome 5 Pro
And, it meets the design requirements of WCAG2 for those especially concerned about accessibility. That’s a big asset of any quality design but especially helpful for a UI kit. Because of these high accessibility standards, you’re starting off from the strongest possible design from the UI kit itself.
Up next we have Brushup, which is a fantastic UI kit for your web design needs. The kit comes with a cleaning company theme but that can be customized to just about any corporation if you’re looking for a business UI kit.
Brushup is one of the best you can get because the XD files are well-organized and the layers are properly named, for example. This way, you’re not looking through to find what you need. Instead, you can get straight to the design work.
Archia is another great website UI kit for you to consider. Although it sets the groundwork for an interior design or architect firm, it too can be easily customized to fit any business. After all, it’s just demo content. It’s the visual design that matters.
Archia comes with a great selection of sections and pages, including:
5 homepage layouts
An about page
A blog and post pages
Various navigation styles
Additionally, know that Archia is based on a 1170px grid system, comes with free icon fonts, and extended documentation.
Karim - Freelancer and Creative Agency XD Template
Karim is another fantastic UI kit example. Why? Because it features two Adobe XD files that are filled with over 20 different designs (each in both light and dark versions). It’s a great template if you’re looking to design a freelancing website, a personal portfolio site, or even a website for a creative agency.
Karim’s layers and groups are clearly and socially labeled, it was designed based on the Bootstrap 4 grid, and the visual design is modern and creative.
Ataman is one of the best UI kits you can come by thanks to the massive amounts of block and element designs (especially for the price). The Ataman UI kit’s visual design is absolutely gorgeous and you can quickly and efficiently create a stunning and in-style design with this UI kit quickly and efficiently.
The hard part will be settling on the right design thanks to the UI kit’s massive size and great design quality. Also, it’s important to note that Ataman comes in both Adobe UX and Figma files (more on those later).
Cryptonit is a high-quality Adobe UX UI kit that features over 40 unique layout designs, is based on the 1170px Bootstrap 4 grid, and comes in both light and dark themes. Note that Cryptonit was carefully crafted by an experienced designer with great attention to detail.
That means this UI kit is flexible and designed for performance and impact. Speaking of flexibility, this design can easily be translated in any number of CMSs including:
If you’re looking for a UI kit with a bold yet simple design, Nijhum might be a great fit for you. This well-designed Adobe XD template can be a great tool if you’re working on a creative website such as an online portfolio or a creative agency website.
One of its cool features is a dedicated assets page. This way, you can quickly and easily edit the UI kit’s assets. After all, it made it on this list of the best UI kits for a reason.
Anon is a fairly minimalist eCommerce UI kit for Adobe XD. The visual design of this template features plenty of site space, large and light images, and fantastic typography.
Did you know Anon comes with over 20 different page designs too? Specifically, it comes with 12 individual homepage designs and 11 inner pages including designs, a shop page, a product page, a blog, and blog posts among others.
LeSigma - Isometric Business Adobe XD Landing Page Template
LeSigma features a lovely and friendly visual design UI kit for a business website. The visual design of this template aimed to get your business to stand out from the rest.
The designers wanted to make sure whoever uses this UI kit is able to start with a clean, modern, and creative design layout. This way, creating an absolutely stunning website for your business is significantly easier, by starting your design process with LeSigma as your Adobe XD UI kit.
Noxia - Creative Multipurpose Business XD Template
Here, we’ve got Noxia which is another modern, simple and clean business UI kit for Adobe XD. It’s one of the best UI kits because it comes with well-documented files that are easy to customize.
Specifically, Noxia creates 28 different designs including various homepages, contact pages, and blog pages, to name a few.
Let’s change things up a bit and check out Wico. Yes, Wico is a great UI kit but instead of a full visual design, it’s a wireframing UI kit.
Maybe you want to do the visual design yourself but need help creating the right layout? Maybe you’re just not ready for the visual design of the project just yet? Whatever the case, it’s always a good idea to have a reliable wireframing UI kit in your toolbox too.
Before we wrap up the Adobe XD website UI sites, there’s one more wireframe UI kit you should check out. Rootline is one of the best UI kits because it comes equipped with over 200 ready to use components and elements.
These components have quite a vibrant and bold color scheme that can make your wireframes a lot more interesting to look at. You should also know that those 200 component are divided into 19 common categories such as:
Blogs,
Contacts,
eCommerce,
Footers,
Headers and many, many more.
9+ Figma UI Kits
Now let’s look at some wonderful Figma UI kits. Once again, we have a great list filled with premium and high-quality website UI kits, some of the best we have on Themeforest.
Up first for Figma UI kits is Kinsey. The visual design style of this template is clearly minimalist, and modern with a high-end look and feel. The color and typography choices are fantastic, as is the use of images and white space.
It’s the perfect UI kit for a creative website such as a portfolio or a creative agency. Kinsey features 10 full-screen sliders, 12 portfolio pages, and 9 blog designs for you to choose from.
Arrigo is another creative portfolio Figma UI kit. It features an incredibly modern and stylish design with a high-end look and feel. This UI kit is best suited for agencies, freelancers, artists, and other creative people. The kit’s designer certainly crafted it with a modern and minimalistic approach. They also wanted this template to focus on content.
Arrigo features:
20 different pages - about, blog, homepage, portfolio, services, etc.
Margin is our next Figma template and it’s one of the best UI kits because it was carefully crafted to perfection. The design is top-notch and extremely detailed.
Although this UI kit’s demo content focuses on marketing, set and startup companies, don’t let it discourage you from whatever your project needs are. It’s quite a flexible kit that can suit a large variety of businesses, not just tech-related ones.
Rhye is another ultramodern, high-end, sleek Figma UI kit on our list. It’s advertised as a wonderful contender for photographers and creative portfolios. That’s because Rhye’s visual design heavily features large images and photographs.
Contrast those with the sleek typography and almost excessive whitespace and you got yourself an ultramodern and high-end UI kit.
Ataman makes its second appearance on this list. That’s because this website UI kit is available for both Figma and Adobe XD. In case you skipped it over under the Adobe XD list, here’s what you need to know about Ataman.
First, it’s quite a massive and versatile UI kit because it comes with over 400 different elements which are divided into 20 categories such as:
Crope is described as a powerful and clean website UI kit. It can work well for web designers, creative agencies, developers, startups, and the like. Its design is definitely geared towards tech websites.
Additionally, this template includes 10 different page designs that are based on the 1170px Bootstrap 4 grid, free icons, and well-organized layers and groups. Crope also comes with limited but free support, which is rare for UI kits.
Orabel is one of the best UI kits on this list because not only does it feature 23 different layout designs, but its visual design style is absolutely stunning. It has a modern look and feel and creative visual design.
Let’s also note that this template features a responsive 12-column, 1400px-based grid system. The design utilizes open-source fonts and images. It’s an ideal UI kit for a portfolio site for designers or as a gallery for photographers or illustrators.
Cassio is definitely an elegant website UI kit. It’s been tailored towards interior design companies, architects, home decoration, and landscape designers who want to showcase their portfolio on a website with a high-end visual design. Cassio incorporated full-screen sliders, galleries, and menus and comes in both light and dark versions.
Digits is a unique UI kit in that it focuses solely on landing pages. It comes with 8 different designs that you can easily mix and match for a fantastic custom design. It’s a great tool for designers who need to mockup and design quickly.
One of its big pluses is the fact Digits’ design has been optimized for conversion. However, it also comes with a wonderful selection of free vector graphics, illustrations and icons, and well-organized and well-named files and layers. Not to mention, this template’s visual design is stunning too.
Similarly to the Adobe XD list, let us end the Figma UI kit list with a wireframe UI kit. Wico is an eCommerce based wireframe kit that’s also available for Adobe XD if you’re interested.
This template is quite versatile and flexible as it comes with over 50 different pages. You don’t necessarily need it to create just an eCommerce website since it also includes not only a blog page and an ‘About’ page but also many common web design sections such as newsletter opt-in, galleries, and many more.
Why Use a UI Kit?
There are so many great benefits in using a UI kit:
1. Save Time
Website UI kits will save you time because the basic design work has already been done for you. All you have to do next is edit the UI kit to fit your specific project or client’s needs.
2. Save Money
The best UI kits will also save money. As a designer, you’re less likely to spend money on additional design assets like fonts or icons. Because they save you time, they can prevent you from needing to hire additional help to finish the project on time.
3. Improved Productivity
Because you’re saving time by using a website UI kit, you can then focus on other aspects of the project such as prototyping.
4. Speed up Design Processes
Similarly to the last point, because you have a pre-made design ready to go you can jump right into user testing or even development.
3 Components of a Quality UI Kit
No two UI kits are the same! But what makes one the best UI kit possible? There are six specific aspects of a quality UI kit that you should keep in mind while shopping for one.
1. Consistent Design
The best UI kits will have a consistent design throughout. As with any design, the devil is in the details. What’s the point of buying a UI kit if you'll have to spend time fixing it? A high-quality website UI kit will have all the details well taken care of for you.
2. A Large Variety of Components
Website UI kits come in all kinds of different sizes. Of course, the key is to get the largest library for the smallest cost. If you have to buy a few different UI kits to satisfy your project needs, it defeats the purpose of using a UI kit in the first place. Of course, the larger the kit, the more it will cost.
3. Well Organized
The files you get once you purchase your UI kit should be well-named and the different elements within the files well-organized and clearly named/identified. The best UI kits allow you to jump right into designing and customizing them. Lower quality UI kits force you to spend time trying to figure out what’s going on instead of letting you use them.
Get Started with a Premium UI Kit for Adobe XD or Figma
Whether you work with Adobe XD or Figma, this list will have shown you some fantastic, high-quality website UI kits to choose from. These UI kits are perfect for projects on a budget. Anyone of the above Premium UI kits is a great choice if you need to quickly get started on a design with a stylish, innovative and professionally crafted template.
A website is essentially your home on the web, so it makes sense that a business needs to invest properly in this area to ensure it projects a professional appearance. For instance:
A consultant needs to convey their expertise and a corporate-looking website will project that confidence.
A lawyer needs to offer a complete rundown of their services and a website with stylish services widget will accomplish this.
Someone working in PR needs to feature their best clients with killer testimonials; appropriate use of a slider will get the job done.
The point here is, small business owners and entrepreneurs can benefit tremendously from having a well-designed, professional website. And as a web designer, it’s your job to build a quality website for your clients—on time and on budget.
Utilizing professional WordPress business themes is one of the best means to that end. They have the quality coding, reliable features, and flexible designs, a new website demands.
Great WordPress business themes like the best-selling Avada (shown above) have powerful design features.
In this article we feature the highest in demand, most popular WordPress business themes on ThemeForest. These are WP themes that have stood the test of time and are kept up to date by their Elite Authors.
Professional Corporate WordPress Themes
These are just a small number of themes that professional web designers are uploading for sale on ThemeForest every week.
Best WordPress Business Themes
Let’s dive right into the top business WordPress themes currently available on ThemeForest, so you can choose one that fits your business or company needs:
Avada is the best selling theme on ThemeForest right now and has been downloaded over half a million times. It can be used to make any kind of website and is dubbed the “Swiss Army knife” of WordPress themes. Make any customizations you want without having to touch the code.
It comes with the drag-and-drop Fusion builder, offers WooCommerce integration, responsive design, MegaMenu, Shortcode Generator, and Fusion Slider. Support and updates are included. You can create a great corporate or creative business site with this flexible WordPress theme.
Enfold promises to be the most "user-friendliest" theme available right now, providing an abundance of features in an easy-to-use package. This theme comes with predefined content, numerous demos, a responsive layout, two-minute setup, a drag-and-drop layout editor, retina-ready graphics, an easy-to-use admin area, WooCommerce support, SEO-optimization, WPML support, slideshows, Gravity Forms support, full documentation, narrated tutorials, and so much more.
Jupiter is a multi-purpose and responsive WordPress theme for business that makes it easy to create websites quickly thanks to a drag-and-drop interface. It’s designed to be lightening fast and comes with over 50 templates that make getting started a snap.
The admin area is easy to use, yet robust, and includes a header style customizer, a background customizer, and more. It also comes with the Edge Slideshow, over 100 elements and 230 styles, 18 header styles, and tons of free add-ons, too.
Another top seller is uDesign, a corporate WordPress theme that’s mobile responsive and offers numerous customization options for beginners and pros, alike. It comes with a drag-and-drop page builder, over 2000 fonts, unlimited colors, and WooCommerce support. It is also optimized for SEO and for speed. It includes access to an exclusive support forum, dedicated support specialists, and regular updates.
The7 is another fantastic theme that is touted as the most customizable around. It comes with over 630 options to create any kind of design you want, for any kind of business you can imagine.
It includes a design wizard, Visual Composer for drag-and-drop layout creation, and access to a design library that you can use straightaway out of the box. The7 also comes with WooCommerce support, portfolio and media album post types, SEO optimization, as well as updates and full support.
Another very popular theme out right now is the responsive BeTheme. It comes with over 180 pre-made layouts that support one-click installation, Muffin Builder 3, and an intuitive design that’s easy to setup and use to create any layout you want.
It comes with 20 header styles, numerous customization options, Mega Menu, parallax effects, video backgrounds, a shortcode generator, a one-click skin generator, font uploader, unlimited menus, and so much more.
Another amazingly comprehensive theme is Karma, which can be used by beginners and pros, offers automatic updates, support, intuitive design options, and an elegant minimal style.
It comes with 30 different color schemes and Visual Composer, plus it’s responsive and optimized for SEO and WPML. This theme supports WooCommerce and Gravity Forms, and it offers tons of ways to customize your site from custom widgets to premium sliders.
Sole is a fast, flexible and easy to use business WordPress theme. It features a visual page builder that makes creating your website very intuitive. As you might expect, it’s a modern theme with excellent visual design. This theme is also fully responsive and Retina ready. It comes with a variety of shortcodes and customized design components to make customization faster, smoother and easier for you. It’s also WooCommerce compatible.
Brünn is a wonderfully colorful WordPress theme that’s perfect for vibrant businesses. The theme is equipped with 12 gorgeous homepages as well as many predesigned inner pages. The theme features custom shortcodes that make editing your WordPress website a breeze.
This theme comes with a powerful admin interface, WPBakery (aka Visual Composer), WooCommerce integration, over 600+ Google Fonts, and is translation ready for multi-lingual businesses.
The Total theme totally lives up to its name by offering a feature-rich experience for site designers new and old. It’s responsive, includes a drag-and-drop page builder, and can be customized to your heart’s content—with or without touching the code.
It comes bundled with Visual Composter, LayerSlider 5, Slider Revolution, and Templatera. It also supports WooCommerce, bbPress, and Contact Form 7, and comes with tons of demos for one-click installation.
Exponent is a dynamic and wonderful WordPress theme for your corporate website. The theme was specifically designated to help you build stunning high performance websites using a fully visual interface. If anything does happen to go wrong, Exponent has exceptional support.
This corporate WordPress theme features tools for GDPR compliance, comprehensive typography controls, and is translation ready for multi-lingual corporate websites as well.
Exponent - Modern Multi-Purpose Business WordPress Theme
Another top seller that’s perfect for business websites is the Sterling WordPress theme. It’s responsive and built on an easy-to-use framework that provides numerous layout options. It’s also compatible with WPML and WooCommerce.
Also, it comes with 3D CU3ER and Layer Slider plugins, full documentation, access to support staff, and training videos. It also supports a ton of shortcodes that make site styling easy.
Nanosoft is a powerful, intuitive and versatile WordPress theme that’s perfect for corporate websites. It was designed to be flexible to the needs of both small and large corporations. This corporate theme was built with utility in mind so to make your content easier to produce and design aesthetically. Also, Nanosoft features the most popular premium plugins on the market including Visual Composer, Revolution Slider, and Advanced Custom Fields.
Cesis is a highly-praised corporate WordPress theme with over 245 5-star reviews. It comes with a variety of different corporate themes such as photography, IT or agency. It was built to let its users have the possibility to modify and control every part of their site with ease.
This business theme comes with full support, updates, and a quick installation guide so you can get up and running fast. It’s SEO optimized, cross-browser compatible as well as retina ready.
This WordPress theme is called Elastik, and it’s a responsive theme that includes all the tools you need to build the perfect business presence. It’s a modern, multipurpose WordPress theme that boasts an ideal style for a professional corporate website. The theme comes with a variety of amazing and diverse features including landing pages, webinar sites, memberships, and product sales pages. It’s a fantastic and reliable WordPress theme.
TheFox is the new multi-purpose WordPress business theme with a trendy design and awesome features.
It comes with a flexible visual composer, so you can customize this theme to your needs and create any kind of website you need, whether you need a highly creative or more corporate look.
This WP theme has a ton of amazing customer reviews as well, complimenting its support, design quality and flexibility. For example from roybeaukers:
“This WP theme deserves nothing less than a 5-start rating. It’s so perfectly done! Also, the support give you if you any questions, is just perfect!”
Pearl is a premium corporate business WordPress theme that is backed by a pack of multi-niche designs and pre-made premium plugins. With extensive features, 200 content modules and a host of niche demos available to be used this theme will surely help you achieve your business needs.
Dynamix is another premium business theme that comes off as a dynamic, fast & responsive WordPress theme that will well suit a wide range of business niches, from a shop to a portfolio website or blog. Its wide plugin compatibility, powerful post blocks, visual customization available and dynamic functionality at its core, Dynamix will be a great choice that can be installed with just one click.
Consulting is another premium WordPress business theme that has been built and optimized for the WPBakery and the Elementor page builders. With over 40 pre-made demos, and deep research in finance and consulting behind its creation - this theme’s developers have done their best at anticipating what features you need.
Consultix is a business consulting theme that will suit most corporate and finance agencies, that is easy to customize, responsive, and powered by an extensive drag and drop page builder.
With Gutenberg compatibility and 25 beautiful demo designs, this theme also comes with the Visual Composer page builder, the Revolution Slider, and 24 custom elements up for grabs.
Incubator is another great option in our showcase of best WordPress themes for business websites. With a theme that will work great for start-ups who seek to have a corporate look with modern touches within their design.
Coming with 12 built-in demos, a one-click demo installation and impressive performance results–this theme provides enough reasons to be an option worth considering.
Broker is a robust and minimalist-looking premium WordPress theme that will be a great solution for any business or corporate website. With several premade designs included by default, the beautiful and customizable backend is well accompanied by the WPBakery and LayerSlider premium plugins that are included free of charge.
Accounting is a premium WordPress theme that comes off with a minimalistic, light and airy feel and look that is well suited for your accounting, business, and consulting companies.
With the WPBakery Page Builder, the Revolution Slider, the multi-language adaptation and an advanced admin panel are only a few of the reasons why this theme could well-suit your next website.
Accounting - Business, Consulting and Finance WordPress theme
Media Consult comes to prove that having a professional and corporate look doesn’t necessarily mean you have to go with a conservative or even boring design. Media Consult is a bright and airy theme that makes use of attractive accent color choices that add life to this design.
The theme is Elementor-ready and uses a unique resource library with whitepaper & report layouts.
Vanguard, another beautiful multi-purpose theme that comes with a 1 click demo installer, a trusted customer support team, and 5-star customer ratings. With its intuitive and easy-to-use backed and multiple pre-made designs, Vanguard will serve most of the design needs a business would have.
Pair that with the one-click demo installation it comes with and we get a theme that's not only easy to use and work with, but also easy to install.
Kalium is the definition of a creative yet professional-looking premium WordPress theme. Kalium has been built by a team of professionals who know what your needs are, that’s why they have put together pre-made full demo concepts that will help serve dozens of industries.
Outstanding typography choices, 6 premium WordPress themes and compatibility with WPML are only a few of the reasons why this theme definitely deserves your attention.
POFO is the last (but not the least) creative business theme included in today’s showcase. With a perfect foundation for a corporate or creative blog or website, this theme will assist in creating a beautiful hand-crafted look.
A multitude of web design trends and extensive functionality have been incorporated in the 25+ unique demos that are available within the theme (such as one-click demo import, WooCommerce monetization options, a WordPress Customizer) and more.
Pofo - Creative Portfolio and Blog WordPress Theme
What to Look for in a High-Quality WordPress Business Theme?
ThemeForest offers a robust and up-to-date selection of WordPress themes across a wide number of niches. Themes span the gamut of topics from business to legal; music to gardening; corporate to marketing. And that’s why figuring out what WordPress theme best suits your company’s needs is so important.
Without narrowing it down, you’ll be faced with almost too many options. And it can be a bit challenging to choose the best WordPress theme for your site. To give you an idea of what your selection process might involve, here are some of the most prominent features included in a quality WP theme:
page builders
sliders
contact forms
customization options
testimonial widgets
portfolios
galleries
service listings and/or widgets
responsive layouts/mobile optimization
The best WP themes, such as those featured below, really nail these features. So, you can confidently grab a robust theme, customize it to your project needs, and get it up on the internet making an impact for your company (or that of your client) in short order!
How a Premium WordPress Theme Can Help Your Business:
A premium business WordPress theme will most often provide a budget solution to a great-looking website. If you go for a theme that has been designed and developed by a reputable developer or agency then you are most likely guaranteed to be getting a design that won't only look good but will also by speed-optimized, mobile responsive and also will come with professional support.
Most premium WordPress themes, and especially the ones in our showcase, come with several designed layouts by default and a wealth of customization variations and options which allow for the website to look exactly as you need it to.
It is now an industry standard to provide visual builders and editors integrated within the themes which makes it rather easy when it comes to editing and working with the design style and content. These editors are so advanced that they will let you edit content blocks, colors, logos, and widgets, making it easy to work with most of the features you would need.
3 Tips for Making the Most of WordPress Themes for Business
1. Choose the Right WP Theme
The right theme can make or break your site. Or, at least, get it started on the right foot. But if you’re not familiar with design this can seem tricky.
A good way to begin the selection process is to view as many websites in your industry as you can. Take note of what design elements you like. Large headers? Multi-column layouts? Lots of whitespace? Seek out web design inspiration and make note of your preferences.
Next, start looking at WordPress themes and read what features are included. You should keep in mind the design elements you identified in the previous paragraph but also consider what features can make what you need happen:
Plan on incorporating a ton of content? A MegaMenu is a good idea.
Want to include a gallery? A theme that has slideshow, slider, and lightbox features built-in are good choices.
Also, make sure you plan your website to match your business goals, learn more about how to do that in this video:
Finally, look at who made the themes that are on your shortlist. Any theme you select should be made by a developer with a good reputation on ThemeForest.
2. Install Your Theme Correctly
Once you pick a theme, it’s important to install it correctly. While I can’t go into much detail here, we cover the process of installing WordPress themes extensively in this tutorial:
You should also know, however, that it can be beneficial to first install a theme on a localhost so you can make all of your customizations before uploading it to the live site. Looking into how to create a child theme is also a very good idea.
3. Be Consistent With Your Branding
Finally, when adding embellishments to your theme and making customizations, it’s important to be consistent in how you represent your company brand. Use professionally design logos and headers. Create a compelling company bio and be clear in what you’re offering. You can learn more about branding in this article:
Get a Professional WordPress Theme Today for Your Business!
Creating a corporate or business website might seem overwhelming at first but with the right WordPress business themes on hand, you can create the best site for your company (or that of your client) without the headaches. And ThemeForest offers more than enough selection to ensure site development goes off without a hitch.
Note: Our staff updates this post regularly, adding the best-performing, most-popular business WordPress themes with professional designs.
If you’ve been running a WordPress site for a long time, you may find that your domain name doesn’t work for you anymore.
Maybe you’ve changed your business name, and need your domain name to reflect that.
Maybe you want a more SEO-friendly domain name.
Or maybe your perfect domain name wasn’t available when you first created your site, and now it is.
You might be thinking that once you’ve set up your website and got your domain name pointing to it, that you’re stuck with that domain name. The truth is, you’re not.
In this tutorial, you'll learn how to change the domain name of your WordPress site without having to create a new site. By following along you will be able to change the WordPress site URL without losing any data.
I'm using Siteground for this example, but the steps are similar for another WordPress hosting provider.
I'll start by showing you how to get a new domain name pointing to your site in the Siteground hosting admin screens, and then I’ll show you the changes you need to make in your site’s admin settings. If you just want to see how to update your WordPress admin settings, you can skip to the next section.
Discount for WordPress Hosting
If you are looking for a WordPress hosting provider, check out SiteGround. It comes with an easy installer, free support, and automatic updates. We're happy to be able to offer a discount of 70% off self-managed WordPress hosting, thanks to our partnership with SiteGround.
Changing the Domain Name That Points to Your WordPress Site
The first step is to get your new domain name pointing to your WordPress site.
This is easier than you may think; in fact, you can have more than one domain pointing to your site. So if you just need an extra domain name, you only need to follow this step.
Note: Any links to your content using the old domain will take people to your 404 page or your home page. To fix this, you’ll need to set up redirections, which you can do with a plugin or in the Siteground admin screens.
Pointing a Domain Name at Your Site from A Domain Registrar
If you bought your new domain name from a domain registrar that isn’t also your hosting provider, you’ll need to start by telling the domain registrar that the domain name needs to point to the server that your site is hosted on.
In Siteground, you can find information about your server’s address by logging in then clicking on Websites > Site tools > Dashboard.
Scroll down to the Site Information section where you will see your IP address and nameservers.
Use the nameserver addresses with your domain registrar to have your domain point to the nameservers your site is using on Siteground.
Note: If you’re using email provided by your domain registrar, you’ll need to use DNS settings instead. If you’re using a third party service such as Gmail you can point your domain to Siteground’s nameservers then point your MX records to Gmail.
Registering a Domain Name with Siteground
If you want to register the domain with Siteground, you need to do this before setting it up as the primary domain.
Log into your Siteground account and go to Services > Domains.
Click the New Domain button at the top right to be taken to a screen where you register your new domain name.
Type in the domain name you want. If it’s not available, keep trying alternatives until you find an available one that’s suitable. Work through the process of paying for and registering the domain name.
It will now be displayed in your account if you go to Services > Domains.
Changing Your Site’s Primary Domain with Siteground
Log into your Siteground account and click the Websites option at the top of the screen to go to the website management screen.
Find the website whose primary domain name you want to change and click on the three dots to the right to reveal the shortcut menu.
Select the Change Primary Domain option.
In the next screen, type in the new primary domain. This will not register a new domain for you—you need to have already registered the domain and have it pointing to your nameserver at siteground.
The system will then process your request and give you a success message when that’s done.
Adding SSL to Your Domain
Before you configure your domain in the WordPress dashboard, it’s a good idea to add SSL to it. This means you’ll be using https:// in front of your domain instead of https://.
SSL will enhance security when people are providing data on your site. It’s essential if visitors are going to be inputting personal details to your site or buying products or services from you. And it has SEO benefits too; Google will rank sites with SSL more highly than those without.
The good news is that adding SSL to your new domain is free using the Let’s Encrypt service. You can either use a plugin to do it, or if you’re with Siteground, you can do it via the Siteground dashboard.
In Siteground, click on the Websites tab and then the Site Tools button for the site you want to change.
In the admin menu on the left, click on Security > SSL Manager.
In the Install New SSL box, click the Select Domain dropdown box and select your primary domain. In the Select SSL dropdown, select Let’s Encrypt.
Click the Get button and wait for the system to process your request and create your SSL certificate.
Adding SSL With a Plugin
If you’re not with Siteground, you may find that your hosting provider gives you access to Let’s Encrypt using their dashboard or the cPanel software. Check with them to find out if it’s available.
If not, you can use the SSL Zen plugin to add free SSL to WordPress.
Start by installing the plugin. In your WordPress admin, go to Plugins > Add New. Type SSL Zen into the search box.
Click the Install Now button. Once Wordpress has installed the plugin, the button will change to say Activate. Click it again.
You will be automatically directed to the setup screen. If not, go to SSL Zen in the admin menu. Clcik the Use free version link at the top to be taken to the admin screen for the free version of the plugin.
Your domain name will be pre-populated. Enter your email address, check the terms and conditions radio button, and click the Next button at the top right of the screen. Continue working through the wizard, including verifying domain ownership. Once you’ve worked through it, you’ll have a free SSL certificate on your website.
Now you have your domain configured, you need to ensure WordPress knows what the correct domain is. There are a few ways you can do this:
in the WordPress admin
using WP-CLI
in phpMyAdmin
Let’s take a look at these in turn.
Configuring the Domain in the WordPress Dashboard
The final step is to change the settings for your domain in the WordPress admin screens.
If you used a plugin to install the certificate, this may have already been done for you—but check first.
Don’t do this until you’re satisfied that the new domain name is pointing at your site. Sometimes it can take any time up to two days for DNS changes to take effect so you need to check this is working.
You can check it by visiting the new domain name in your browser or by using the What’sMyDNS site.
Once your domain name is resolving correctly, it’s time to change your WordPress settings.
In your site admin, go to Settings > General.
In the WordPress URL and the Site URL fields, change the URL to your new domain name. Remember to use https:// if you’ve added SSL to your domain (which I would recommend).
Now scroll down and click the Save Changes button. Your site will now resolve to the new domain name.
Once you’ve done that, you might find that you still have links in your posts that use the old domain name and URL. You need to replace these with links using the new URLs.
Use the Better Search Replace plugin to do this, replacing the old domain with the new domain throughout your site.
Configuring the Domain Using WP-CLI
If you’re using WP-CLI to manage your site instead of the WordPress admin, you can set up the new domain at the command line.
Start by connecting to your server using SSH in the way you normally do. Then make a backup of your database before you make the changes, with this command:
wp db export
This command will create a backup of your database into an SQL file. Once you’ve done that, type this command:
Replace olddomain.com and newdomain.com with your old and new domains in the command above. This will find all instances of the old domain in your database and replace them with the new domain.
Once you’ve done this, you need to flush your website’s cache with this command:
wp cache flush
And that’s it. Your site will now work with the new domain name.
Configuring the Domain in phpMyAdmin
The final option is to use phpMyAdmin to configure the new domain name with your site. Before you do this, take a backup of your database using the Siteground backup tool (Site Tools > Security > Backups) or with your backup plugin.
In the Siteground dashboard, go to Site Tools > Site > SQL. Click the phpMyAdmin tab on the screen.
Click the Access phpMyAdmin button to open phpMyAdmin.
Click the Databases tab and select the database for your site. Click on the wp_options table (or the xx_options table if your tables have a different prefix where xx is the prefix, as they will if you used the Siteground WordPress auto installer).
In the option_name column, find the siteurl and home fields.
For each of them, click the Edit link and then replace the existing domain name with the new domain name. Click Go to save your changes.
Exit phpMyAdmin and clear your browser cache, then check your site on the new domain. It should be working.
Note: If there are links in your posts that use the old domain name, you’ll need to replace those in the database. Use the Better Search Replace plugin to do this.
Your site will now work with the new domain!
Summary
Changing the domain name of your WordPress site does involve a few steps but it is something you can do.
Follow the guide above to pointing your new domain at your server and then configuring WordPress to use the new domain, and then your site will function on the new domain as if it had always been there.
The Best WordPress Themes and Plugins on Envato Market
Dropshipping is a great way to make money online without having to come up with a product of your own. With dropshipping, you’re selling products from third party stores for a price that you set.
Creating your own dropshipping store is easy with Shopify. It’s even easier when you use a Shopify theme designed with dropshipping stores in mind. In this post, we’ll share the best Shopify themes for dropshipping in 2020.
Find the Best Shopify Themes For Dropshipping on Envato Elements
If you’re looking for the best Shopify themes for dropshipping stores, look no further than Envato Elements. Envato Elements is a subscription-based marketplace that offers hundreds of Shopify themes. You can download as many Shopify themes as you want and try them out to find the one you like best.
Another place where you can find amazing Shopify themes is ThemeForest. ThemeForest has hundreds of Shopify themes, including dropshipping themes for Shopify. You can purchase each theme individually and customize it to fit your needs.
Top Shopify Themes For Dropshipping Stores From Envato Elements
The themes from Envato Elements have a modern design and come with all the necessary features to create a powerful dropshipping store. Take a look at some of the best Shopify themes for dropshipping websites from Envato Elements.
The Big Sale is a modern and clean multipurpose dropshipping theme for Shopify. This theme can be used for any type of dropshipping store. It integrates with Oberlo and features 12 different homepages. The theme is also packed with features such as Ajax-powered search, product filters, megamenus, product quick views, and more.
The theme is easy to customize thanks to Visual Builder so you can easily drag and drop various elements onto your page. You can also choose your own colors, fonts, and more. You’ll also find a newsletter popup built-in social sharing features, and lazy loading images. The BigSale theme is fully responsive and optimized for SEO.
Planet Tech Store - Ecommerce Shopify Theme For Dropshipping
If you want to create a dropshipping store to sell tech products, the Planet Tech Store is a great theme to use. It was designed with tech stores in mind and has a clean, trendy design. The theme is fully responsive and comes with the ability to display your most popular products or product categories on your homepage.
You can also display your store policies prominently so your customers know what to expect. The theme is fully customizable so you can easily choose your own fonts, colors, and more. It also supports features such as Ajax-powered search and product filtering, several blog layouts, product quick views, and more.
The MegaStore theme has a professional design. You can use it for all kinds of dropshipping stores, from tech and gadgets to fashion and beauty products.
The theme has all the necessary features needed to create a powerful dropshipping store that provides your customers with the best user experience. For example, the theme includes a flexible, built-in mega menu and smart product quick view. You’ll find layered navigation and support for various product labels to mark which items are new, popular or on sale.
The MegaStore theme is responsive and optimized for SEO. It’s also fully customizable and comes with built-in social sharing options.
Arthur | Minimal, Clean & Beautiful Dropshipping Shopify Theme
If you’re looking for a theme with a clean and minimal design, be sure to check out the Arthur theme. It’s fully responsive so you can rest assured that your store will look and work great on desktop as well as mobile devices.
The Arthur theme supports intelligent filtering, Instant Product Search system, product quick views, and more. The theme was designed to load fast and is SEO optimized. It’s also fully customizable and integrates with Oberlo. In addition to that, the theme supports new lookbook, dynamic checkout, advanced variant swatches, popup login, Instagram shop, and more.
If you’re looking for a versatile Shopify theme for dropshipping stores, try the Palos theme. It has a modern and stylish design with beautiful featured and header images. The theme’s homepage is well organized and visitors can easily see which products are popular and which ones are new thanks to product labels.
The theme is responsive and has 7 demos to choose from. You’ll also find features such as mega menus, product quick views and filters, automatic price changes, advanced layered navigation, and more. The theme is responsive and you can easily customize fonts, colors, and more using the Customizer.
Top Shopify Themes for Dropshipping Stores From Themeforest
As mentioned earlier, ThemeForest is another place where you can find amazing Shopify themes for dropshipping stores. The themes on this list have trendy designs and they integrate with dropshipping websites like Oberlo and AliExpress.
Kalles - Clean, Versatile, Responsive Shopify Theme For Dropshipping Sites
The Kalles theme is a versatile Shopify theme for dropshipping stores. It has multiple demos to choose from so you can easily find a demo that’s suitable for your dropshipping niche.
The theme is easy to customize and you can choose your own fonts, colors, and more. It’s fully responsive so your customers will be able to easily browse your store no matter which device they’re using. This theme includes features such as advanced product type, video and 3D product thumbnails, verified purchase notifications, cross-sells, and more.
The Dropshipping theme was built with fashion stores in mind. It has an elegant and modern design. With over 40 premade homepage layouts, you’d be hard pressed not to find one that suits your style. The theme is also easy to customize so you can easily add your colors and fonts.
Notable features include entry popup, internal site search, product filtering, product countdowns and shipping time estimator, and more. In addition to that, the theme is compatible with Oberlo so you can easily import hundreds of products to your store. The Dropshipping theme has been optimized to load fast and it comes with built-in social sharing options.
The Gecko theme has over 20 different demos to choose from which makes it a great choice no matter what your dropshipping niche is. The theme has a minimal and modern design and a well organized homepage that makes it easy to see the most popular products or new arrivals.
It also includes numerous header layouts and features such as support for Shopify sections, product quick views, mega menus, video thumbnails, Instagram feed display, and more. The theme is responsive, easy to customize, and optimized to load fast.
Elessi 2.0 - Responsive Shopify Theme For Dropshipping Stores
The Elessi theme is packed with cool features. For starters, it has a very clean design. Secondly it includes features such as mega menus, wish lists, sticky add to cart option, size guide, trust seals, and more.
It also includes features such as product quick views, Ajax-powered search and product filtering, product countdowns, and back in stock notifications. It’s fully responsive, includes 9 demos to choose from, and is easy to customize.
Bstore - Multipurpose Shopify Theme For Dropshipping
This multipurpose Shopify theme has full compatibility with Oberlo and Aliexpress. You can quickly and easily import hundreds of products to your store and start selling them. It’s also packed with features designed to help you sell more of your products.
This includes product quick views, drag and drop sections, product slider, layered navigation, several homepage layouts, and more. The theme is also easy to customize and is fully responsive. You’ll also find mega menus, custom blog layout, dropdown cart and more.
Five Quick Tips For Dropshipping Websites
Now that we’ve covered dropshipping themes for Shopify, let’s go over some quick tips for dropshipping websites that will help you create a successful dropshipping store.
1. Make Sure Your Website is Organized
The most important tip is make sure your website is well organized. Keep the most important pages in your main navigation and make use of mega menus to organize your categories. Your website should also be easy to navigate to ensure your visitors and customers can easily find products they are interested in.
2. Focus On Marketing
Once your dropshipping store is up and running, your primary focus should be marketing and driving traffic to your store. This will help you get visitors who are interested in your products and the first sales.
3. Create Useful Content
A great way to market your store is to create useful content. This can be gift ideas for a particular niche, gift guides, tips on using specific products, product comparisons or reviews, and similar. On top of helping your visitors get familiar with the products you’re carrying, it also helps you rank better in search engines as they love websites that are regularly updated.
4. Use Helpful Features
Most Shopify themes come with useful features such as product quick view, mega menus, filters, and more to make the user experience on your website as good as possible. This will make your customers more likely to return for repeat purchases.
5. Make Sure Product Photos Are High Quality
Lastly, keep in mind that presentation is everything when it comes to online stores. As such, your product photos need to be high quality. Be careful when choosing products to import into your store and make sure the product photos aren’t blurry or poorly lit.
Envato Elements vs ThemeForest: Which One Should You Choose
As you can see, there is no shortage of amazing dropshipping themes for Shopify on both Envato Elements and ThemeForest. But which marketplace is the best choice for you?
Key Benefits of Envato Elements
Envato Elements has a pretty powerful offer: for a single monthly price, you get access to hundreds of Shopify themes as well as other web mockups, stock photos, icons, and other design assets.
What’s more, you can download as many assets as you want, customize them to suit your needs, and use them in an unlimited number of projects.
Key Benefits of ThemeForest
ThemeForest is a part of Envato Market which is a suite of marketplaces catering to different creative needs. It has hundreds of Shopify themes that you can purchase individually, customize them to your needs, and launch your dropshipping store.
Which One Should You Choose?
If you’re a designer working with multiple clients or an entrepreneur with multiple brands, Envato Elements makes the most sense as it gives you the best bang for your buck.
Sign up for Envato Elements and start downloading Shopify themes and other creative assets for your dropshipping business.
If, on the other hand, you only need creative assets occasionally, ThemeForest is the best choice as you can buy Shopify themes as you need them. Visit ThemeForest (or another Envato marketplace) to find the perfect creative asset for your needs.
Launch Your Dropshipping Store Quickly With Shopify Themes
As you can see, launching your dropshipping store is not difficult when you have a great Shopify theme to start with. Find the perfect dropshipping theme for Shopify on Envato Elements if you need design assets on a regular basis.
Migrating your WordPress site to a new hosting provider might be easier than you think. Follow these 10 tips to help make it run smoothly.
If you’re planning to transfer your WordPress site to a new hosting provider, it’s important to get it right.
Moving your site may feel daunting. And it is a big step: it involves moving all your files and your database, and getting your domain name to point to your new hosting provider.
But it doesn’t have to be difficult. A quality hosting provider like Siteground will help you transfer your site with minimal hassle, and get you quickly up and running with your new, faster site.
So if you’re thinking of switching, here are our tips to help make the process smoother and avoid any headaches.
1. Find the Right Hosting Provider
Switching hosting providers is something you don’t want to do too often. Once you’ve found a provider, you’ll normally find it cheaper if you sign up to an annual plan instead of a monthly one. And you don’t want to risk your site being unavailable if you move your hosting again and again. You also don’t want to spend any more time than you need to making the switch.
So take time to identify the right hosting provider for you. Look at your site stats: how much sever space you need, how many sites you’re running or plan to run, and how many visitors you get each day.
It’s also important to choose a provider who knows WordPress inside out. The WordPress.org website recommends hosting providers that they trust: that are reliable and understand how WordPress works. Don’t be tempted to go for a cheap plan from a generic hosting provider. They won’t know WordPress, and the reason they can make their plans so cheap is by providing inferior service.
SiteGround is recommended by WordPress.org. It comes with an easy installer, free support, and automatic updates. We're happy to be able to offer a huge discount of 70% off self-managed WordPress hosting, thanks to our partnership with SiteGround.
On the other hand, if you're looking for free hosting, we've put together a list of the best free WordPress hosting providers.
Once you’ve identified a reliable hosting provider that you’re confident will give you a high level of service, it’s time to pick a plan.
With most providers it is possible to upgrade your plan, but that can involve switching servers which will mean some extra work for you and possibly a bit of downtime. So it makes sense to pick a plan that will future-proof your website.
Siteground offers three plans, aimed at everyone from beginners to web professionals. If your needs are towards the top end of a plan, it’s worth signing up to the one above it, as then you know your site will perform as it grows and develops.
3. Update Your Old Site
Before you start, assuming you can still access your old site, run an update to your themes and plugins, as well as to WordPress itself.
This means your old site will be running as smoothly as possible, free of any potential performance or security bugs, and better aligned with your new site's software.
Your new site will be running the latest version of WordPress, and the latest versions of plugins and themes too. If you make sure your old site is up to date, it’ll make it easier to create the exact same site again when you migrate.
If you find that your site breaks when you do this, it might be time to review the themes and plugins you’re using, and find some more reliable ones for your new site.
4. Make a Backup of Your Old Site
The transfer process shouldn’t affect your old site, so it’s unlikely that it’ll run into any problems.
But I always advise anyone undertaking a major operation on their WordPress installation to take a backup first, to be on the safe side.
Use your backup plugin to take a backup of your site, and make sure it’s stored somewhere separate from your site—ie. not on the same web server.
Don't rely on the backup your old hosting provider may or may not have taken. Two of the main reasons for looking for a new hosting provider are poor support and lack of reliable backups. If you need to restore from a backup, you want to have something you have control over and know you have access to.
5. Point Your Domain Name to Your New Hosting Provider
Whether you do this before or after the migration will depend on how well your site is running right now.
Some people prefer to run the transfer process, check the new site using a temporary domain (more on that shortly), and then get the domain name pointing to their new site when it’s all ready.
But if your old site is currently experiencing problems (which could be why you’re moving), you’ll want your new site to be up and running at the correct domain as quickly as possible.
Changes to your DNS settings (which dictate where your domain is pointing to) can take up to two days to take effect. So the earlier you do this, the quicker your domain will be working with your new site.
You can check whether DNS has updated by using the WhatsMyDNS site.
6. Consider Transferring Domain Registration to Your New Hosting Provider
If your new hosting provider also offers domains, it could be cheaper, easier and more reliable to move registration of your domain across to them along with your hosting.
While it is possible to have your domain registered with one company and your hosting with another (and you’ll need to do this if your hosting provider doesn’t also register domains), it does make things simpler if you have both in the same place.
Check if your new hosting provider offers a free domain name with your new hosting plan—some offer a free domain name for the first year. This will benefit you if you want to change your domain name, or you want to have more than one domain name pointing at your site.
If you transfer registration of your domain from your old registrar to your new hosting provider, and your domain registration isn’t due to run out soon, it shouldn’t cost you anything to switch. You’ll just need to pay your new provider for the domain registration the next time renewal comes around.
7. Choose How You’ll Migrate Your Site
When it comes to actually moving your site from your old hosting provider to the new one, there’s more than one way to do it. Which you choose will depend on what your new hosting provider offers: a good one will help you with the migration or even do it for you.
If your site is unusually complex, you have multiple sites to migrate, or you prefer to have full control, you might choose to do the migration manually.
Options you have available will normally be one or more of the following.
Your New Hosting Provider Does the Migration For You
A good provider will migrate one or more sites free of charge. All you need to give them is your credentials for the old site so they can access it and move it across.
If you have multiple sites to migrate or your site is unusually complex, your hosting provider may not be able to do this for you, in which case you’ll have to go with one of the other options.
Use a Migration Tool Provided by Your New Hosting Provider
If your hosting provider can’t do the migration for you, the next best option is an automatic migration tool. Siteground has a migration tool that you can use as many times as you like to migrate as many sites as you like. It’ll even migrate multisite networks.
Check with your hosting provider if they have a tool like this: it could save you a lot of time and hassle.
Use a Migration Plugin
Another option is to use a plugin that you install on both your old and new sites to export the site and then import it to the new site. Generally you’ll find this goes more smoothly if you use a premium migration plugin—there are some good ones on CodeCanyon.
This will take a bit more work than using a migration tool like the one offered by Siteground, as you’ll have to install the plugin in both sites and then run the export and import. If you’re changing domain names, you’ll also have to make changes to the database to reflect this. A good migration plugin will let you do this when you’re sitting up the migration, and won’t require you to edit the database manually.
Run a Manual Migration
The final option if you’re comfortable with databases and FTP is to migrate your site manually.
This consists of five steps:
Export the database from your old site using phpMyAdmin.
Create an empty WordPress site on your new server and drop the database tables.
Copy files for themes, plugins and uploads from your old site to your new site.
Import the database to your new site, again using phpMyAdmin.
Check the two sites to be sure everything is aligned.
8. Use a Temporary Domain Name to Make Improvements to Your Site
If you want to work on your site before making it live at your new hosting provider and want to keep the domain name pointing to your old site while you do that, you can use a temporary domain to access your new site until you update the DNS settings.
This means that if you want to change the theme, install any new plugins or make updates to the content, you can do so while visitors aren’t coming to your new site. You should also hide your new site from search engines so people can’t stumble upon it.
To do this, go to Settings > Reading and check the Discourage search engines from indexing this site checkbox.
Once your new site is looking the way you want it to, you can then either point your domain name to the nameservers at your new hosting provider, or transfer your domain registration to your new provider if they also offer domains.
Don’t forget to unhide the site from search engines once you’ve done that, or all your SEO efforts will go to waste.
9. Check Your New Site is Running Correctly
Before you’re done, you need to do some testing, just to be sure everything has migrated across as it should. If you’ve used an automated tool or your provider has done the migration for you, there should be no issues, but it doesn’t hurt to check.
If you’ve changed your domain name as part of the transfer this is particularly important. Make sure every link in your site points to your new domain name and not your old one. This will include links in widgets and menus as well as those in your posts and pages.
You can use the Better Search Replace plugin to scan your database and check for any instances of the old domain name, and update them. Be careful if you will still have legitimate uses of the old domain name—in email addresses, for example.
Take a good look through your new site, checking the following. You might want to have a copy of both sites open while you do this, but make sure you don’t get confused between the two. I find it helps if I have them open in different browsers.
Open every page and archive and check it displays correctly.
Open a selection of posts to check them—if your site is big, you might not be able to test every single one. Check custom post types too.
Click on the links in your widgets and navigation menus and check they’re pointing to the right place (and using the new domain name if you’ve changed it).
Check that images are loading correctly.
Run through any processes on your site such as filling in forms, purchasing products etc. and check they work correctly.
It’s a good idea to ask a few trusted people outside your organization to check the site is working okay for them—this will ensure that it’s not just working correctly when accessed from your IP address and that any cached files aren’t being affected by development work you’ve been doing.
Once you’re happy with your site, it’s time to publicize it.
10. Tell the World About Your Fantastic New Site
If you’ve used the migration as an opportunity to make improvements to your site, then now’s the time to start telling existing and potential visitors and customers.
Even if you haven’t changed anything about your site, it’s a good idea to publicize it and take advantage of the extra capacity afforded by your new hosting plan.
Use your social media channels. Ask your fans and visitors to do the same. Run a sale. Create some awesome new content. Offer incentives to new mailing list signups. Anything you can do to get more visitors to your site will help make the most of the investment you’ve made in quality hosting.
Over time, your visitor numbers will rise and your new hosting plan will be able to meet the demand. Keep and eye on things to be sure you don’t need to upgrade your new plan at any point. And enjoy your smooth-running, reliable new site!
Summary
Migrating your site to a new hosting provider is something many WordPress users find daunting. But it needn’t be difficult.
If you follow the tips in this article, you’ll be able to migrate your site smoothly and get yourself a more reliable, better performing site with a new hosting provider.
If you need a new WordPress hosting provider, take a look at SiteGround. It comes with an easy installer, free support, and automatic updates. As partners with SiteGround, we are able to offer a discount of 70% off WordPress hosting.
With the ever increasing popularity of hailing services like Uber and Lyft, some might say car ownership is becoming less and less justified. However, stats show that some areas (anywhere outside of Seattle!) are actually seeing an increase in car ownership. Car rental services are also seeing impressive growth worldwide.
For these reasons, we have compiled a handful of beautiful, versatile and feature-rich premium automotive WordPress themes that will assist you in creating an automobile-oriented website, be that a car rental, a magazine about cars, or a car service landing page. With a variety of themes across several niches, we are sure you’ll find one that will fit your needs in terms of finding the right theme for giving your next website a fresh look, or revamping your existing one.
Rear view
What to Look for in an Automotive WordPress Theme?
There are several factors you should pay attention to when choosing an automotive theme:
1. Be Sure the Theme You’re Picking Fits Your Niche
Make sure the theme you’re picking is well fitted to your niche. A car rental theme won’t suit an auto mechanic’s website so well, therefore picking a theme that has relevant design elements and appropriate functionality to the sector you’re operating in is important
2. Look for Distinctive Design Characteristics and Features
In this day and age, when there are swathes of stunning themes available, you should not limit yourself in the style and functionality you want to use on your website. Long gone is the time where there was a need to use a generic magazine theme for an automotive magazine because the market was lacking such specific themes. Profit from what’s available.
3. Don’t Go For the Most Supercharged Theme Just For the Sake Of It
With the amount of themes available nowadays and the great number of details designers and developers put into creating them, it’s easy to be tempted to just go for the most complex design. It is important, however, to go for the design that fits you better (even if that means fewer features or a couple less available integrations). Less is more.
Best Automotive WordPress Themes
Here are 25 of the best automotive themes for WordPress available right now on ThemeForest.
Carutos is one of the new car themes on ThemeForest. You can use this WP automotive theme for everything from a car wash business to car rental agencies. The Elementor Page Builder lets you create pages quickly using drag and drop. You can easily customize this template and make it yours.
Do you want a modern, responsive car dealer theme? Try Harrier, one of the best new car themes on ThemeForest. It gives you full control over the customization of webpages and is easy to use. Harrier has unlimited icons and colors, and documentation if you're stuck.
Sell, buy, and hire with the CaLeader WordPress car template. This WP automotive theme comes with multiple layouts, post formats, and widgets and sidebars that you can take advantage of. You'll enjoy how easy it is to build your catalog and customize its look with the CaLeader automotive theme for WordPress.
Build your professional car website with Autlines. This WP automotive theme specializes in car booking and also works for car dealers. Autlines supports multiple languages and one-click demo import. Creating your site with this automotive template for WordPress is easy.
Whether you have a great homepage or not will decide if visitors want to stay on your site. That's why the Carbonick WP automotive theme gives you multiple homepage options that have a modern design. It's a great website option for a body shop or car parts store.
The makers of this WordPress car template wanted to combine the needs of an automotive business and modern, minimal design. They succeeded. It's easy to use for WordPress beginners and has a user-friendly front end design. The autoRoyal template is one of the most versatile car themes on ThemeForest.
A clean design is very fitting for a car wash WP automotive theme. Aqualine is responsive and looks great on both desktop and mobile devices. The included booking service plugin makes this one of the more useful car themes online. Customize Aqualine to make this WordPress car template fit your branding.
Autostar is a premium WordPress theme that is meant to be used on car dealerships and automotive-related websites. With extensive functionality providing the possibility to offer car rental, this theme is best used for companies providing such services.
With a sleek and elegant design with bright colors, this theme is a good choice to consider.
Auto Service; another WooCommerce-integrated premium WordPress theme that is packed with the revolution slider, a drag and drop builder and a fully responsive layout.
A sleek, elegant and minimalistic dark navy layout definitely adds sophistication from a color standpoint which well fits the automotive market and niche. With several thousand copies sold already and outstanding ratings, this theme is not worth passing by!
Chromium is an elegant, modern, and powerful automotive WordPress theme aimed primarily at sites that sell automobile accessories online. It will also suit perfectly if you are planning to build or refresh any kind of automobile related site like a car repair shop, a car wash, auto repair services company, oil changing company, etc.
Chromium can also serve as a great theme for a car blog, auto dealer site, auto trader catalog, and pretty much any other site in the vehicle maintenance business
Chromium - Auto Parts Shop WordPress WooCommerce Theme
Car Repair is a premium automotive WordPress theme that features 3 different layouts with a responsive and retina-ready layout. The Visual Composer and WPML support are a great add-on to the template.
Built on the Bootstrap framework, this is a great theme to extend yourself, if you enjoy getting your hands on the theme’s code.
Car Repair Services & Auto Mechanic WordPress Theme
If you want to give your car rental business a spur by having an impactful online presence then Rentit a premium car rental WordPress theme is a good choice for cab service owners.
Rentit gives you what you need in order to reach the latest standards of design and technology. It comes with WooCommerce integration that unlocks the revenue potential of your web page coupled with the multiple payment option channels and coupon systems supported by the plugins that come packed with the theme.
Rentit - Multipurpose Vehicle Car Rental WordPress Theme
Carshire is a car repair service theme that is built on HTML5 and CSS3 and is paired with Visual Composer and Revolution Slider. With a thematic design oriented at auto mechanics and repair shops, this WordPress theme will serve as an alternative to the listed themes in our showcase.
Car Shire - Auto Mechanic & Repair WordPress Theme
Driveme driving school WordPress Theme has been custom designed to suit any type of training institute or school. The theme is acclaimed for its flexibility and versatile design that is meant to suit different training institutes and customer support for those schools.
With a clean and well-written codebase at its foundation, the theme’s elements are used to list courses or trainers that can be modified to act as price lists and similar visual elements. The existing functionality and the additional course and booking pages serve well the needs of a driving school website.
AutoParts is a fresh, retina-ready and fully responsive premium WordPress theme that features bold interface elements and thematic icons and imagery. With a WooCommerce ready integration, easy installation and compatibility with Visual Composer - it is one of our great theme choices.
iReca is a WooCommerce-based premium WordPress theme that features extensive functionality meant to satisfy the needs of a car rental business. With multiple payment gateways, a booking calendar, inventory management system and Visual Elementor as its features by default, it’s hard to go wrong if you consider this your next theme for your car rental business.
Ireca - Car Rental Boat, Bike, Vehicle, Calendar WordPress Theme
CarRepair WordPress theme is a great choice for full-service auto maintenance and auto repair service websites. Besides, this auto mechanic premium WordPress theme will make for a great e-commerce shop for car parts and accessories, or basically any website that requires functionality that is close to the automotive industry. The theme comes with RTL support, support of bookings and a team management system.
CarRepair - Auto Mechanic & Adjustment WordPress Theme
CarWash is a premium automotive WordPress theme that is oriented towards mechanics, car wash shops, and detailing centers. With a dark and bold design, the theme comes as a fully responsive theme that features a multitude of unique and customizable elements and features.
Driving School is a Bootstrap based premium WordPress Theme targeted at driving schools and private driving teachers. The theme was created with the needs of auto schools in mind, featuring a great course management functionality.
Combining the necessary modules and assembling the necessary pages, the theme comes as a great choice amongst the showcased options.
Autozone is a modern and well-structured premium auto dealer WordPress theme with a clean, sleek and intuitive design. The theme is a great fit for car rental services because of its targeted functionality at booking, managing, listing and displaying the available cars and accessories.
The built in functionality also allows for monetization through advertisement banners and their management, and advanced integration with WooCommerce and various payment gateways. It's an excellent auto dealer and car rental theme that's worth trying.
Auto Image is another premium automotive WordPress theme in our showcase that is a feature-rich theme that is a great choice for a car dealership or rental website. With a Visual CSS style editor, integrated Revolution Slider and page builder - the website proves to be a great choice because of its extensive functionality and flexibility in design.
Automotive is a sleek and well-designed premium WordPress theme oriented at car dealerships that doesn’t just look beautiful, but also includes a vast and easy-to-use functionality.
Regardless of the size of your car dealership business, this theme proves to be a great choice. With source files included, visual composer, filterable listings, and an inventory management system, it’s hard to beat this theme functionality-wise.
Automotive Car Dealership Business WordPress Theme
Quattro is a modern WordPress theme that comes with an integrated car booking system that allows for the selection of a car according to certain parameters as well as thorough integration with WooCommerce.
The theme was created with the latest plugins in mind, two of which being Visual Composer and Revolution Slider. The theme is perfect for a car dealer website, a parts store, or any site of a similar niche that is heavily search-based.
This car dealer WordPress theme has a lot to offer. The small file size makes this template run faster than other car themes. Each of the 14 unique layouts can be loaded with one click and customized just as easily. If you're looking for the best car themes you can use, try Car Dealer.
Do you want to have an online presence for your car parts shop? Try Autima, a creative WordPress car template for an auto parts store. It is a highly responsive car dealer theme, with a simple, smart design. Add your brand logo and colors, and update the theme's catalog to make it yours.
Free WordPress Themes From ThemeForest
Premium car themes are the best choice when designing your website, but they might not fit your budget. That's why ThemeForest offers a selection of free premium WordPress templates each month.
Free WordPress themes from ThemeForest are a great option if you're on a budget because of their professional design and easy to understand license. You won't have to worry about quality or usage rights with free templates for WordPress from ThemeForest.
5 Free WordPress Automotive Themes
The official WordPress website is home to many free templates that you can use! Here are just a few of the automotive WordPress themes for free download.
Automotive Centre is a versatile WordPress car service theme available for free. It has clean code and professional design. There are many personalization options to choose from in this automotive WordPress theme free download.
Show off your goods with this WordPress template. The simple column layout is easy to edit, and Auto Store supports image galleries. It's a great option if you need a WordPress showroom theme.
Have you been looking for a car magazine WordPress theme? Try out Moto News, one of the best car themes you'll find for free. The design is easy to understand. Its homepage puts top stories front and center, making it easy for visitors to navigate.
This automotive WordPress theme free download has a great, minimal design. Navigation is easy for visitors with VW Automobile Lite's layout. If you need a WordPress showroom theme or a WordPress car service theme for free, try this one out.
Last on our list of free WordPress vehicle themes is Advance Automobile. This versatile template can be used for everything from car rentals to auto parts. It's also a nice option if you need a WordPress car service theme for free. Thanks to its language support, you can serve clients from around the world.
What to Look for in an Automotive WordPress Theme?
There are several factors you should pay attention to when choosing an automotive theme:
1. Be Sure the Theme You’re Picking Fits Your Niche
Make sure the theme you’re picking is well fitted to your niche. A car rental theme won’t suit an auto mechanic’s website so well, therefore picking a theme that has relevant design elements and appropriate functionality to the sector you’re operating in is important
2. Look for Distinctive Design Characteristics and Features
In this day and age, when there are swathes of stunning themes available, you should not limit yourself in the style and functionality you want to use on your website. Long gone is the time where there was a need to use a generic magazine theme for an automotive magazine because the market was lacking such specific themes. Profit from what’s available.
Brand New Car in Showroom
3. Don’t Go For the Most Supercharged Theme Just For the Sake Of It
With the amount of themes available nowadays and the great number of details designers and developers put into creating them, it’s easy to be tempted to just go for the most complex design. It is important, however, to go for the design that fits you better (even if that means fewer features or a couple less available integrations). Less is more.
5 Tips for Using WordPress Car Themes
You don't have to be a WordPress expert to set up a WordPress car template. In fact, the best car themes are very easy to use. All you need is some effort and more help with understanding the platform. If you're new to WordPress, have a look at these five tips you can use to work on your WP automotive theme.
1. Use Plugins
Plugins can add more functionality to your WordPress vehicle themes. Some plugins, like WooCommerce, can make crucial business functions run smoother. Most premium, new car themes from ThemeForest include plugins, so try them out!
2. Compress Images
Nothing kills traffic like slow loading times. While most of the best car themes are optimized for speed, large images can undo this work. Find a website or program like TinyPNG that can shrink the sizes of your photos by deleting unnecessary information.
3. Check Your Site's Analytics
The only way to know if your website is reaching its audience is by looking at the numbers. Google Analytics is available for your site through plugins, and an easy way to see what changes you can make to increase traffic.
4. Be Mobile Friendly
In 2020, most people visit websites on a cell phone or tablet computer. When you're choosing from vehicle themes, make sure they are responsive and mobile-friendly. You might even want to see if they were designed for mobile-first and optimized for desktop.
5. Get the Padlock
If you look at your browser's navigation bar, that little padlock on the left means the website is secure. For users, this Secure Sockets Layer, or SSL, is a sign that a website is trustworthy. Getting this free certificate should be a priority, especially if you plan on selling products online.
You’ve Reached the Finish Line
This concludes our showcase of premium automotive WordPress themes but we’re curious to hear which you preferred, or whether there is a great theme you’re using that we missed–be sure to leave a comment below to let us know!
A beautifully designed Shopify store will attract more traffic and better engage visitors. The more your customers immerse themselves in your products and content, the more positive results your sales figures and bottom line will see.
For beauty and cosmetic stores an attractive design is a no-brainer. Shopify themes help you design the kind of store that will stand out from competition by reflecting your style.
Beauty and Cosmetics Succeed with Shopify
Beauty and cosmetics brands do really well with Shopify; possibly the highest profile example of this being Kylie Jenner and her successful stores Kylie Cosmetics, Kylie Skin, and others.
In fact, Kylie cosmetics Shopify beauty stores are so successful that surges on product launches are a genuine risk; once that tweet or Instagram post announcing a new product goes out shop admins can expect a mad rush to the checkout. Shopify has dealt with this phenomenon in all kinds of ways, but its reliability and server stability has allowed Kylie launches to go ahead without any issues.
“What Kylie’s story proved is that entrepreneurship takes on many forms. That bombshell and business savvy aren’t mutually exclusive. And, that the future of entrepreneurship is what you make it.” – Shopify
Kylie cosmetics Shopify beauty stores are an awesome source of inspiration
If you want to follow the Jenner's footsteps, then take a look at Kylie cosmetics Shopify store. It's fully responsive and has a clean and minimalist design. It's no doubt Kylie cosmetics Shopify beauty stores are experts on their field.
If you give it a read, you'll get some useful inspiration and the story behind Kylie cosmetics Shopify beauty stores.
And so it’s no coincidence that Shopify also powers the eCommerce for sibling Khloé Kardashian’s denim line “Good American”, which famously brought in $1M worth of sales on its launch day. If Shopify can handle Kardashian-levels of store traffic, it’s clearly an eCommerce platform worth considering for your cosmetics and beauty website.
Stunning Beauty and Cosmetic Shopify Themes on Envato Elements (With Unlimited Use)
Now, after reading everything about Kylie cosmetics Shopify beauty stores, you can find loads of awesome and stylish Shopify themes on Envato Elements. It’s a great offer: download as many as you want for a single monthly fee.
Download as many Shopify Themes on Envato Elements as you like
Shopify themes on Envato Elements cater for all kinds of niches, but we’re going to run through the best themes for cosmetics and beauty, whether you’re selling makeup and beauty products, targeting women or men, or even promoting a health and beauty spa. Let’s take a look!
Sasha Cosmetics Shopify theme is a stylish theme that is easy to use. It utilizes a drag and drop editor so you don’t need to know any coding to use it. It comes with all the essential features your online business might need including product filters, Ajax cart, wishlist, multi-currency, quick links, and product badges.
You can sort your products in multiple ways such as by featured, best selling, alphabetically, date and price.
Looking for Kylie cosmetics Shopify inspiration? This cosmetics store theme is a great choice. It's loaded with responsive design, so it looks good on any device. You can showcase your products as a carousel and give your clients the option to create an account and leave reviews. This retina and eCommerce ready theme is one of the best beauty Shopify stores themes we've got.
Do you want the best beauty Shopify store for your spa? Check this elegant and modern option. This cosmetics store theme works for a spa salon, nail salon, wellness center, healing center, and salons and beauty stores. Check its responsive design, slick slider, customer accounts, product carousel and many more useful features.
No doubt, this is one of the best Shopify themes for beauty. Sofee features advanced sorting options, so your customers can get the exact beauty products easily from your inventory. With this cosmetics store theme you can bring more clients from various countries to your store using the multi-currency option. Check this fully responsive and retina ready theme!
Her Pride is an awesome Shopify store example created for the online stores selling makeup, cosmetics, fragrance, lotions, skincare, accessories, and all beauty related products. This is one of the best beauty Shopify stores, it's highly customizable and responsive ready.
Cosmify is a fully responsive Shopify theme that comes with a very sleek and simple design to suit your cosmetic and beauty store. Features in this Shopify theme include: mega menus, layer slider, Google Web fonts, product widgets, brands slider, Ajax add to cart, product image light box, and much more.
The Eli Lipstick fashion & cosmetic Shopify theme is a gorgeous theme for managing your online lipstick store. This theme uses the latest Shopify SEO features and it’s easy to customize–no coding knowledge required.
It comes with 5 types of mega menus, and sliders to help raise the quality of your content. Customers can set up accounts, register, login, change addresses and view past orders. You can easily link your Mailchimp account to the built-in newsletter form, and customers can share what they like by Twitter, Facebook, Google+ and Pinterest.
Dudu Shopify Cosmetics theme is packed with elements that will make your cosmetics website stand out from competitors. Your customers will be able to create accounts, register, login, change their addresses and view past orders. They can sort products by price, A to Z, or newest in order to compare product prices. They can pay using multiple major currencies that are inbuilt with the theme. Finally, your customers can leave reviews on your website. We think this is a nice Kylie cosmetics Shopify inspiration.
Bardy Beard Oil Shopify theme is perfect for selling varieties of beard oil. It’s quick to install. It has a neat, clean and simple design. It is equipped with a drag and drop editor that makes it easy to customize your website to reflect your unique style. It also comes with features like Blog Grid, Blog List, and Blog Sidebar that help you write content that engages visitors to your website.
In addition, there are many options to feature your products like product badges/stickers, product details, product zoom, product popup, and more.
Simba Beauty Shopify theme has 3 versatile templates that you can customize to suit the requirements of your cosmetics. You can change colors, fonts, and background images through the theme settings. You can create a seamless checkout experience for your customers using your logo and color scheme. And you can also add a custom checkout header to your checkout screens.
To build a solid customer base and email list you can link your newsletter to MailChimp. Customers can also share your content by Twitter, Facebook, and Pinterest.
Beauty Store Cosmetics is a stylish and fashionable Shopify theme that displays beautifully across all devices from desktop to mobile. It comes with 5 different styles of the mega menu, 8 types of header, and 8 variants of the footer. You can display products in grid & list mode and also in a product owl carousel.
Customers can zoom to enlarge a product image, they can add a product to their wishlist, while the product color swatch gives them ability to see products in different available colors. For sales promotions there is a built-in timer countdown. Finally, you have the ability to integrate your store with Instagram.
Hair salons and barber stores sell a lot of services and products, so finding a specialized theme built specifically for this sector can be hard.
The Triss Salon and Barber Store Shopify theme is built exclusively to address the problem. It comes with tons of features that make it perfect for the hair business. For example:
5 types of Mega Menu,
custom information widget,
filter products by colors and other parameters using tags,
an option to purchase the items without leaving current page,
an option keep your items in wishlist.
Finally it comes with an advanced slider feature to display your products in formats like: slider, carousel, hero scene, and featured product slider.
Odour Perfume is a very comprehensive cosmetics Shopify theme that will help you create an outstanding online store. It is quick and easy to install and comes with 3 home page variants, a dropdown menu, slider, and a video banner.
In addition, it has features that are focused on helping you increase the reach of your business through dropshipping and affiliate marketing. It has Google Analytics for reports that give you a complete picture of your business.
Finally, Odour Perfume Shopify theme comes with documentation that includes well commented HTML and CSS.
Avery is an elegant and artistic Shopify theme. Its sleek and smooth design provides a perfect solution for the stores selling hair, cosmetic, and skin care products.
It is loaded with features that will allow you to build a website that attracts and keep buyers engaged.
Front-end features include an attractive homepage, about us page, catchy inner pages and contact page. The pages are highly customizable using a drag and drop feature. You can change colors, fonts, background images.
Be-You Cosmetics Shopify theme is highly flexible and easily customizable. Its comes with advanced features that are guaranteed to make your store visible in a competitive market place. These features include:
Mega menu that shows product categories, sub-categories, and top links in a single area to provide a perfect way to your buyers to find whatever they need in a few clicks.
Daily deal module that lets you set up countdown time for the daily and weekly deals
Newsletter where your customers can subscribe to keep informed about your latest products and special offers.
Social network channels where your customers can keep updated with new products and sales.
Bonita is a stylish and modern beauty/cosmetic Shopify theme. It is flexible and easy to use. It comes with features that help you create a professional online shop that engages your customers. Some of the features include: products sliders that allow you to display your products in attractive ways, an option to show products in a carousel, product sale labels, and a feature that allows customers to compare products by categories like prices, A to Z, and newest.
You can allow customers to purchase items without leaving the current page, and they can pay with any major currency.
Looking for more Shopify store examples? This is one of our best Shopify themes for beauty and spas. The theme is easy to use and mobile-friendly. This cosmetics store was created in accordance with the modern trends in the web design. It features a responsive design, customer accounts and ajax filters.
Muhil is one of the best Shopify themes for beauty and hair. The Shopify store example was designed to create a wonderful Hair Wig & Hair Salon online shopping website. The Shopify theme has a fully responsive design that works on any device and features a fantastic product carousel.
Charmee is a great Shopify store example because is fully responsive, retina ready and eCommerce ready. It can be one of the best beauty Shopify stores for perfumes thanks to its attractive shop page layouts.
This multipurpose Shopify theme is a fantastic options for any online store you've got in mind thanks to its 20 demos. Each of them are handpicked and tailor-made to suit their niches. This theme works great as a Shopify cosmetics store, as you can see in this demo. This theme is fully responsive and eCommerce ready.
Mika - Multipurpose Sectioned Shopify Theme
4 Tips for Marketing Your Shopify Store
Building your online store and launching it is just the beginning! Customers have to know that your store exists. There is very stiff competition. By knowing how to market yourself you will be able make a dent in the market and sell effectively. Here are some tips to help get your marketing game off the ground.
1. Be Active and Visible on Instagram
As Kylie Jenner has proved time and time again Instagram is very supportive of brands. It provides a built-in and highly engaged audience. Creativity and originality in how you present your store and products to an Instagram audience ensure you are going to build a following. These are leads that you can convert to loyal customers. You have the advantage of being able to interact directly with the audience and building trust. Adding a “Buy Now” button to your products is a big plus.
2. An Email List Means Repeat Customers
Building an email list is building your repeat customer base. People in your email list end up becoming regular and loyal customers. Sending regular and interesting newsletter emails to your audience creates engagement. Invest in a good email marketing platform like MailChimp and find creative ways to have visitors on your website sign up for your newsletter.
3. Content is Still King
Blogs are powerful tools for store owners. Content helps raise SEO ranking. This means more traffic. Post regular and interesting content that is useful for customers and that they can apply to their own lives to show that you have more to offer them than getting them to buy your stuff. Think of how knowledge you have gained in your niche can be useful to your customers.
4. Take it to the Road
Traditional ways of marketing still work. You can hand out flyers. You can go to weekly markets. You just need a stall, card reader, and of course your products.
Learn More About eCommerce and Shopify Templates
I hope you've liked the selection of the best Shopify themes for beauty and you've found some Kylie cosmetics Shopify inspiration. Next up, after the useful marketing tips, I'd like to share with you even more helpful resources, so you can launch an amazing Shopify store.
Extra for web designers and developers: we've created this Shopify guide especially for you! If you'd like to learn how to build Shopify themes, check it out!
Before you go, let me share with you some of my favorite Shopify themes from our Envato markets. If Kylie cosmetics Shopify beauty stores aren't your thing, I'm sure you'll find what you're looking for here:
Launch Your eCommerce Site With a Great Shopify Theme
The design of your store matters! Alongside performance it is the first thing visitors to your website take note of. Their first impressions may mean staying and engaging with your store or moving on to the next. Have a look at our best Shopify themes and build your online store with a design that reflects your brand.
Yoga studio doors may have closed during lockdown, but that’s done nothing to quell the growing appetite for the discipline. In fact, it’s surged in popularity during lockdown—with global uptake rocketing by a staggering 42%. Whether you’re looking to set up shop or revamp your digital offering, read on to find out how you can quickly and easily build a high-quality yoga website that doesn’t stretch your budget as much as your body.
How to Create Yoga Websites
You don’t need years of design or web development experience to create a website that tells your business’ unique story. Instead, you can head to ThemeForest and scroll through hundreds of Wordpress yoga workshop themes and pick your favorite—from there, you simply download it to your PC and customize it to make it your own.
WordPress themes for yoga on Envato Market
You can pick a yoga WordPress theme with features like eCommerce where you can sell your workshops online, and video galleries where you can upload home workouts.
Top 18+ Yoga WordPress Themes
Read on for our pick of 18+ of the best WordPress themes for yoga studios.
With more than 50,000 sales and an average rating of 4.65 out of 5, this is a yoga WordPress theme with plenty of fans. As flexible as your joints, uDesign comes with plenty of demos each designed with a specific business in mind.
The huge variety of styles shows just what’s possible with the uDesign template. The yoga demo template is beautifully designed, with a full-width header and clear call to action, content blocks heroing given services, and the ability to pay for different yoga packages.
This yoga WordPress theme screams style. Last updated in June 2020, it comes with all the latest features including being Gutenberg-optimized for easy editing. It also offers a WooCommerce shop, a plugin that enables users to purchase directly from your website. With an appointment form and a reservation form, Spa Lab has everything you need for your site to mean business.
Subtle animations bring this yoga WordPress theme to life as the user scrolls. It’s also super simple to navigate, coming with a mobile nav for smartphones, sticky navigation, and a mega menu to display the breadth of your services. It’s fully responsive and offers 5 different header designs, a workout page, and a news and blog template.
Just scroll down the demo of this yoga WordPress theme to see the wide variety of content blocks available—from a ‘success stories’ section with before and after shots to a booking form and an online shop. It’s also highly visual, so you have plenty of opportunity to display your wares or stills from your online classes.
Another high-impact yoga WordPress theme—and one that comes with a timetable, classes info, Revolution Slider and an events calendar. It’s also high speed and highly customizable, with 30+ demos ready to be adapted based on your requirements, and a footer layout builder to help you share the important information in the way you want.
Designed specifically with yoga in mind, Yoga Fit is sure to have everything you could need to make your business a success. Gutenberg-optimized, it comes with a beautifully designed classes timetable and it’s fully compatible with all the key plugins, like Events Calendar and WooCommerce. Premium support is also included indefinitely too—ideal if any queries pop up further down the line.
This yoga WordPress theme perfectly combines style with simplicity. It’s also retina-ready, meaning you won’t need to worry about clarity being lost when users zoom in, for example.
You can also make the most of animated galleries, a well-organized page where you can display photography or other brand assets. Layer Slider and Revolution Slider are included within the cost.
Head on over to the HEALTHFLEX demos and you’ll find the Yoga Studio example. This one stands out for its no-fuss approach—large content blocks for full-width imagery including the header, an ‘about us’ section, services, and a large testimonial section take up the majority of the space within the demo. It means finding key info couldn’t be easier.
HEALTHFLEX - Doctor Medical Clinic & Health WordPress Theme
Only released in June this year, Rosaleen is one of the newest yoga workshop themes out there. However, glance at the comments section and you’ll already find plenty of happy customers. There are 3 demos to pick from—each one is crisp and modern in design. Click on Home 1, for example, and you can see video content blocks where you can start to display home workouts or other brand assets.
Another newcomer to the block after being released in March this year, Adhi is a content-rich choice. Of course, you can change the information available, but you can view the demo as an example—with info including yoga positions, pose tips, quotes, background information, a blog, yoga packages, plus the ability to book directly.
With plenty of customization opportunities, let your creativity run wild with Kriya Yoga! You can create your own courses with the in-built courses page, and include a poses module with filters displaying multiple characteristics, like price, hours, days, and ratings.
Kriya Yoga - Health, Meditation and Yoga WordPress Theme
This yoga WordPress theme comes with 12 aesthetically-pleasing homepages—each different in their own way. The Yoga Studio template opts for a bright and colorful header, which can be dialed back if you prefer a different tone. Copy is minimal, with icons quickly guiding users to relevant information.
Dark and brooding in its demo color scheme, Tantra has a different vibe to many of the other yoga workshop themes. Of course, colors can be adapted based on your requirements. Like many of the yoga websites, Tantra has been optimized for mobile use, meaning all sections support the scroll effect. It also uses the mobile-friendly Revolution and Swiper sliders.
Tantra | A Yoga Studio and Fitness Club WordPress Theme
Another yoga WordPress theme that comes with the Revolution Slider, you can easily add video backgrounds to make your site really pop. The minimalist shop is a great feature, showing users your wares quickly and effortlessly. Image blocks of different sizes also add to the visual appeal of this effortlessly simple yoga template.
The video section of this yoga WordPress theme is an impressive feature—and one that could prove especially useful in today’s climate. Uses can see the hero video along with its title, as well as a well-designed back catalogue of previous content. The trainer section where visitors can learn more about their teachers is also a nice touch.
This deluxe yoga WordPress theme oozes class. Spacious typography and muted color tones set the mood for the template. It’s lightning fast, fully localized and translation ready, responsive, and comes with a tabbed timetable system to help your users find the classes most relevant to them.
If simple is what you’re after then this free yoga WordPress theme may be just what you’re after. With a full-width header and call to action followed by image blocks signalling different services, Yoga is a great option for any new or already flourishing yoga companies.
As the saying goes, there’s beauty in simplicity and VW Yoga is a stunning example of this. Similar in layout to the previous template, the nav bar is currently ordered by ‘home’, ‘about’, ‘pages’, ‘blog’, and ‘contact us’. This free yoga theme WordPress also includes a highlighted call to action to encourage users to book classes.
Fully responsive, compatible with all browsers, translation-ready, and search engine optimized, Meditation And Yoga has got plenty going for it—and it’s free! It also comes with multiple layout options with and without sidebars, and plenty of header and footer styles and is one of the best free WordPress themes for yoga teachers.
Meditation And Yoga (free WordPress Theme)
Free vs Premium Yoga Website Templates
As you can see from this list alone, there’s a huge amount of variety when it comes to yoga WordPress themes. If you have limited budget or are just starting out, then picking a free yoga theme WordPress may be the way to go. However, if you’re looking for more features and greater functionality, then selecting a premium yoga WordPress theme may be the best option.
Build Your Yoga WordPress Theme Today!
Now you’ve seen our pick of 18+ of the best yoga workshop themes, we hope you’re closer to creating your dream website. To view the full collection, head to ThemeForest.
Do you have any comments or are there any other yoga WordPress themes you think should have made the cut? Let us know below.
Keeping your website secure is something every website owner worries about. And for good reason: if your site is hacked or goes down, you could lose business.
WordPress used to have a reputation for being insecure. But these days, it's no longer true. Some of the world’s largest brands, including major news corporations and government departments, use WordPress for their websites. They wouldn’t use it if it’s not secure.
But WordPress is open source software, which means anyone can access the code. And that means hackers can try to identify vulnerabilities and exploit them. Luckily the WordPress community is on top of this, and security updates are released regularly to fix any vulnerabilities. So as long as your site’s up to date, you have less to worry about.
In this post, I’ll show you some ways to make your site more secure. I’ll include best practices for security and show you how to make your site less vulnerable to hackers.
Let’s start with some best practices.
WordPress Security Best Practices
Before you start installing security plugins or tinkering with your wp-config.php file to make your site more secure, there are some simple best practices you can follow to enhance security in your WordPress site.
These are:
use strong passwords
keep your site up to date
only buy plugins and themes from reputable sources
use secure hosting
disable the theme editor
take regular backups
use SFTP to upload files to your site
add SSL to your site
install a security plugin
use a security service
Let's take a look at what each of these means.
1. Use Strong Passwords
Using strong passwords is the simplest and one of the most effective lines of defense against hackers. You should always use passwords that include a combination of letters, numbers and special characters, and make sure other users on your site do so too.
You can check your passwords on the How Secure is my password? site to find out how long it would take an automated system to crack your password. The password I use for my site would take 16 billion years to crack, so I don’t think there’s much chance of anyone guessing it.
You can also force other users of your site to use strong passwords using a plugin like Force Strong Passwords. Alternatively if you have Jetpack installed, you can force strong passwords using that plugin.
2. Keep Your Site up to Date
Another simple but very effective way to keep your site safe is to ensure it’s up to date.
Some WordPress updates are to introduce new features. Others are to fix bugs. But plenty of them will add security patches, and you want to make sure your site has those.
Make sure you update your site whenever the dashboard tells you to, and diarize to check it regularly. This applies to themes and passwords as well as to WordPress itself.
Alternatively, you can install a plugin that will manage and automate updates for you. The Easy Updates Manager plugin lets you choose which themes and plugins to keep updated and will run a regular check for you and run updates.
If you do automate updates, make sure you take regular backups of your site in case an update causes problems.
3. Only Buy Plugins and Themes from Reputable Sources
When you’re choosing themes and plugins, it’s important to only install ones that you are confident will be free of bugs or malicious code.
With free plugins, it’s a good idea to only install plugins and themes you find in the theme and plugin directories (which you access via your WordPress admin). These themes go through quality checks so you can be confident they’ll be well coded and free of any malicious content.
If you choose to buy premium themes and plugins, make sure you buy them from reputable vendors like CodeCanyon and ThemeForest. Ask other WordPress users and look in forums for recommendations.
If you’re ever tempted to download a free plugin from anywhere other than the theme or plugin directory, stop to check the source carefully first. If the provider is offering the plugin for free and hasn’t submitted it to the official directory, ask yourself why they might be doing that. There’s a chance they could be doing it because they want to introduce vulnerabilities to your site or at the very least insert spammy content or links.
The Best WordPress Themes and Plugins on Envato Market
When choosing your hosting provider, take the time to find a reputable provider who will provide guarantees about security and uptime. A dedicated WordPress hosting provider like Siteground will be able to help you with any security issues you might have, and will take steps to keep their servers secure.
The hosting plan you go for will also have an impact on security. The cheapest hosting plans are cheap because they have hundreds or thousands of clients and websites on a server. The more people using that server, the more opportunities there are for introducing security problems.
So before you go with that ultra-cheap hosting provider, ask yourself if it might cost you more in the long run.
Special Discount for WordPress Hosting
For secure hosting, take a look at SiteGround. It comes with an easy installer, free support, and automatic updates. We're happy to be able to offer a huge discount of 70% off self-managed WordPress hosting, thanks to our partnership with SiteGround.
5. Disable the Theme Editor
The theme editor, or visual editor, is a screen in your WordPress admin you can use to edit the code in your theme.
It might look like a really handy way to tweak your code, but it has some serious risks attached to it. When you edit code using the theme editor, the old version is not backed up. You have no way of rolling back your changes if you do something that breaks your site or introduces vulnerabilities,
If you want to edit the code in your theme (or create a child theme to modify your theme, which is better precise), then you should use a code editor and SFTP.
You can disable the theme editor by adding two lines of code to your wp-config.php file:
That way you and other users of your site won’t be tempted to use it to make quick tweaks that could cause you big problems.
Note: only modify your wp-config.php file if you’re confident doing this sort of thing.
6. Take Regular Backups
It’s good practice to keep your site backed up regularly. This way, if your site is hacked or it breaks after an update, you have a recent version you can restore.
Install a backup plugin and set it to automatically back up your site as least as often as you update the site. So if you’re adding to your site every day, back it up every day. That way, if you do have to restore the most recent backup, you won’t lose much content.
The same goes for automatic updates: if your updates plugin is running updates every day, you should also back your site up every day.
If you’re editing and uploading files to your WordPress site (eg. theme and plugin files), then it’s important to do this in the most secure way you can.
Using SFTP instead of FTP means that that the files will be encrypted before you upload them. So no one can access them while you’re transferring them to your site or downloading them to your computer.
This is particularly important if you do this kind of work on a public network, such as coffee shop Wi-Fi. Ideally, you should avoid using public Wi-Fi to manage the files in your WordPress site, but in reality we’ve all had times when we’ve needed to upload a file urgently and can’t wait till we get back to a more secure connection.
A good hosting provider will provide SFTP as part of their service—ask them to tell you how to access it and set up keys for use when transferring files to your site.
8. Add SSL to Your Site
Adding SSL to your WordPress site means that the https:// at the beginning of the domain name will be replaced by https://.
Adding SSL to your site is free with Let’s Encrypt and will give you two benefits:
It will make your site more secure. Adding SSL means that data sent between your server and the user’s browser is encrypted. This is essential for any sites where users are asked to input personal data, even an email address. And for e-commerce it’s even more important. In fact, if you install WooCommerce on a site without SSL, the plugin will repeatedly warn you that the site isn’t as secure as it should be.
You can install a free SSL certificate with Let’s Encrypt, either via your hosting provider’s dashboard or by using a plugin. See our guide to SSL to find out how to do it.
If you want to have ultimate control over security in your site and monitor it for any problems, then it’s a good idea to install a security plugin.
Security plugins will monitor your site for downtime or security breaches and email you if there are any problems. They’ll also let you configure security settings to harden your site and make it even tougher for hackers to get in.
There’s a range of free security plugins available via the plugin directory, but if you want extra protection, it can be a good investment to install a premium plugin. This way you get access to advanced features like enhanced firewall protection, IP and country blocking, and help getting your site back online off it’s hacked.
You can also sign up to a security service like Sucuri that will monitor your site and help you fix it if it’s hacked or goes down. This can seem expensive—but if your site is breached, the time you will save and the potential business you might lose will make it worth your while.
Cloudflare is another service that was initially designed to help boost website performance, but also has a security service that will monitor your site, help you keep it secure, and fix it for you if it’s hacked. This is a good option if you also want to take advantage of Cloudflare’s content delivery network, which will help your site run faster.
Summary
Keeping your WordPress site secure is an essential part of website management. If your site was to be hacked or break after an update, you could lose hours or maybe days fixing it. And if you have to pay someone to fix it for you, that can be expensive.
If you follow the tips above, you’ll be able to protect your site from the majority of security risks and rest easy in the knowledge that your site is running smoothly and not being hacked. How far you decide to go and how much you can spend on security will depend on your site and your budget, but you should certainly use secure passwords and keep your site updated as a bare minimum.
The Best WordPress Themes and Plugins on Envato Market
Here are a few of the best-selling and up-and-coming WordPress themes and plugins available for 2020.


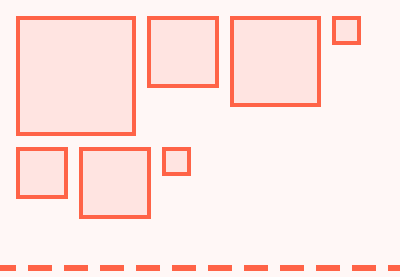


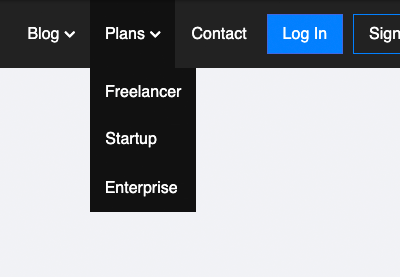


.jpg)


.jpg)
.jpg)
.jpg)


